



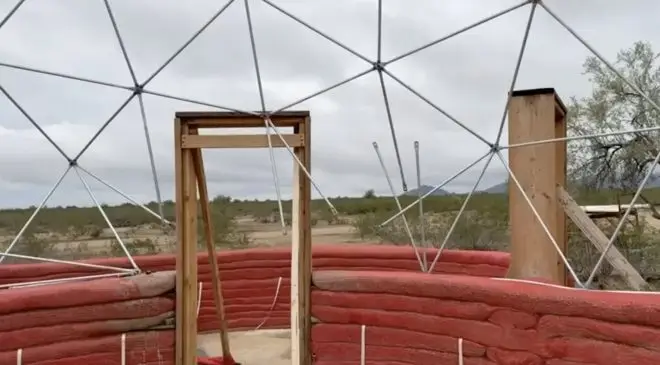
Undeveloped Side vs Managed Side — Same Rain, Different Result
Welcome to Occupy the Land. After the rain we walk
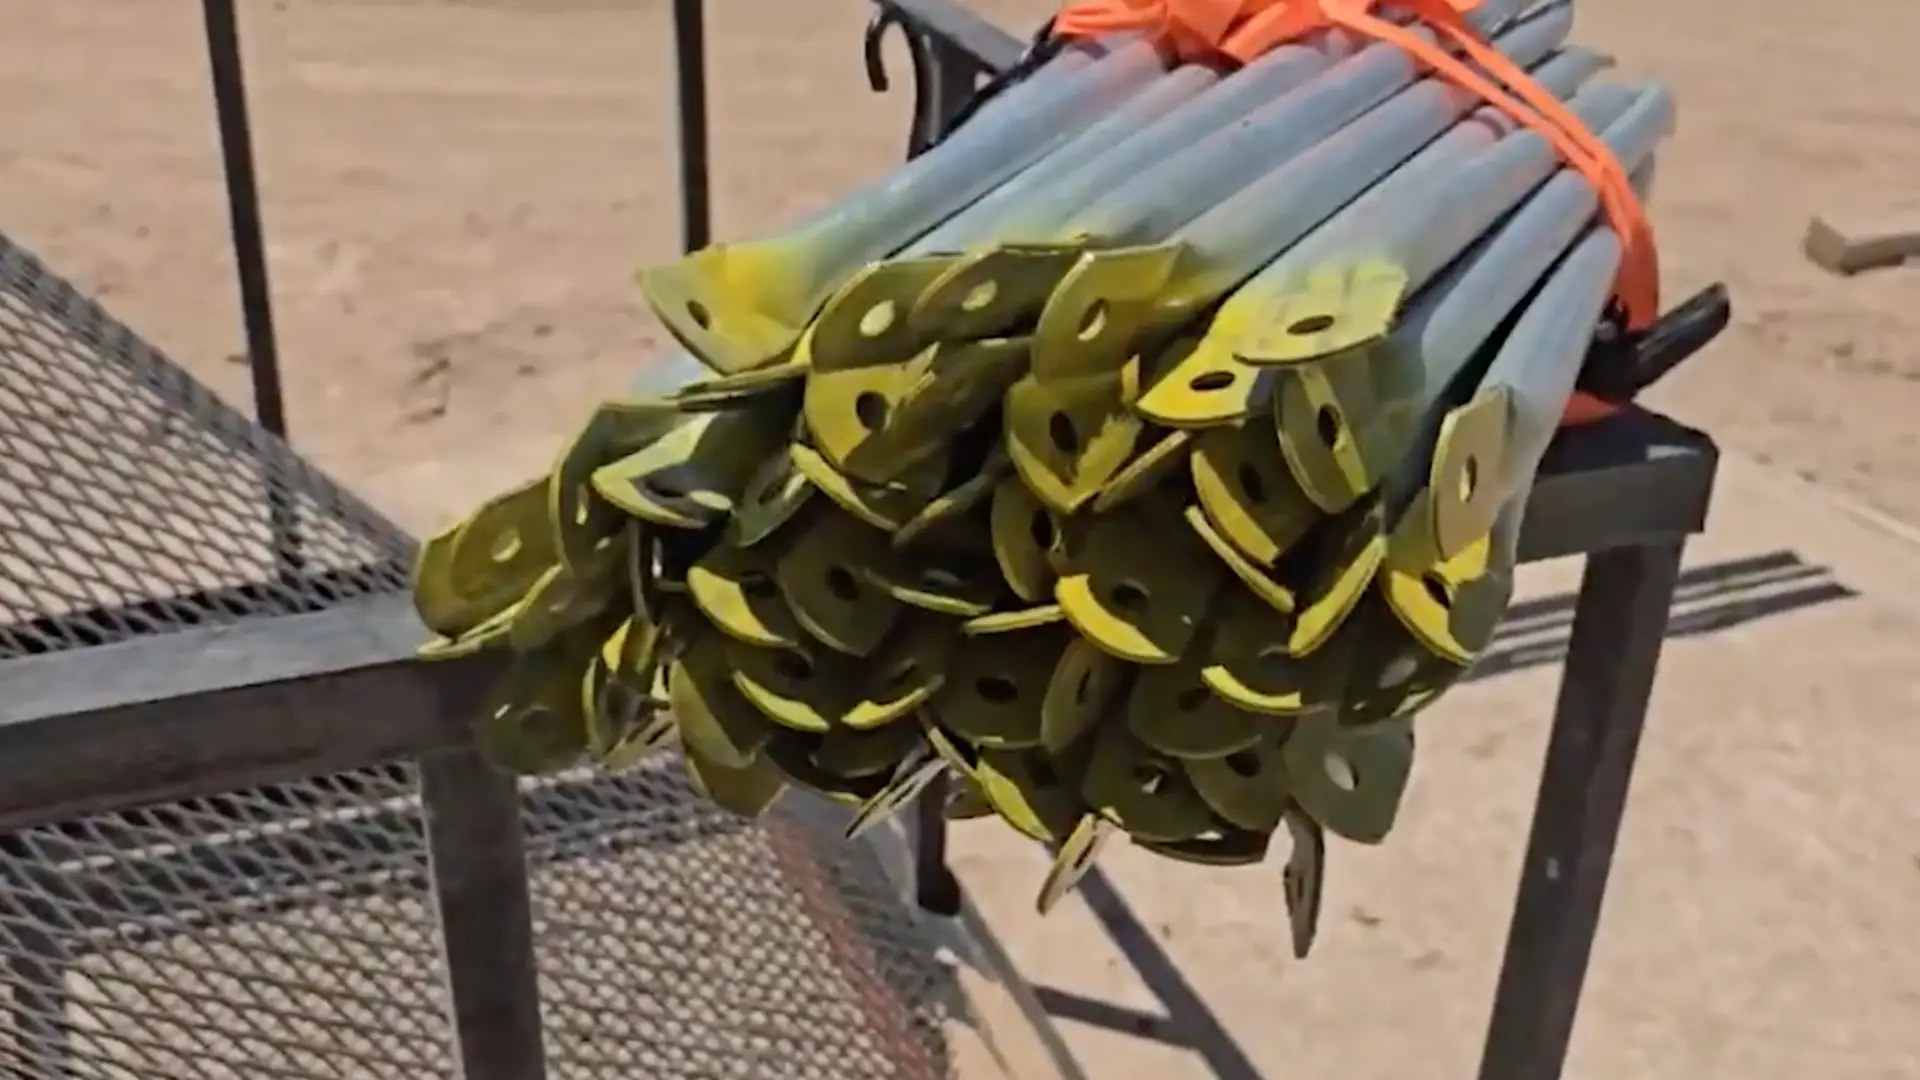
In this episode of Occupy the Land, we dive into the fabrication phase for the 20ft geodesic sphere root cellar! Ernie sets up the stamp press and welder, demonstrates cutting 10ft EMT conduit to length, flattening, rounding ends, and punching holes for the struts. He explains the dome calculator math in metric, hole-to-hole measurements, trim allowance, color-coding, and ergonomic workflow for efficient production of 160 struts. The sphere will form the cool underground storage with a second-level workshop floor. A detailed, hands-on look at turning raw conduit into the structural framework for long-term food preservation in the desert! Peace.
Transcript:
Welcome to occupy land. Occupy the land. Now, I got a dress up, and that was great concern. A lot of people, I showed, you know, my crappy well, jobs on this. I am happy with the welder. It does give nice beads, but I just kept going over it, and I had the, the the darkness of the welding thing was set to.
I couldn’t see what I was doing, so it really messed it up. But just so you guys don’t freak out, you know?
They are strong. They aren’t going anywhere. So that was my main goal is them to hold up. So I’m happy with it. It’s fine now I’m going to be welding up the road home and I wanted to show you the strength is there. It’s fine. I’m getting a lot of good penetration and so on, but, I’ll try and make it prettier.
So, you know, you guys get off my butt. But I am capable of doing better welds. It was. That was not really the point. My thing was, I by myself, you know, I’m holding attacking it. I mean, you know, get over it. But the main thing is function. Now, sometimes you want to have nice welds and so on.
We’ll work on that when it’s time. Now on this I.
I’ll try and make some prettier weld. So you guys get off my butt. But I just want you to know it’s working fine.
Okay. You can see how the road home works just as a chain. Just throw it over a hitch. And even this Polaris can pull it so it goes through. It goes out to here, and then it catches it and brings it back and smooth it out. That’s why we had to go so fast as we were kicking out the rocks out.
Pass this. But it works well and it doesn’t dig. The reason this comes out this way is if you just keep going up and down your driveway, what happens is you just dig a a ditch so it keeps the soil there. Just it just evens it out. Now here on this road, you do it enough times. Now this is what we were talking about.
It was kicking up big rocks and or my neighbors. She just had a car tires that wasn’t doing well with it, so I welded it back up. I could show you all my great, not so great welds, but I’m not. It works. I went over and over and over it. A lot of times you do beads on like excavator buckets, so they last longer.
So in the bottom areas and a lot of them in the point and so on. I put extra beads there for that reason because you could see it was starting to wear with what we were doing. But I’m going to go around, you know, and even out the hopefully get my tractor tomorrow and then we can actually fix everything, but I’ll go around and make it nice before Donna gets back.
So I finished putting all the hardware cloth on the coop, and the only thing I have to cover now is that triangle shape up there. Probably just put some shade cloth in there, add additional shade and allow for ventilation. The next thing I have to do is go around the perimeter and just the front section. Here we dug a trench and there’s hardware cloth that stretches from the very top of the frame all the way down here.
And I’m just going to put some Portland cement, throw some dirt on it with it so it’ll harden up and it’ll keep hopefully the predators from being able to dig under there and get inside.
Welcome to occupy the land, occupy the land. Now we’re getting ready finally, to start cutting the struts and fashioning them and going through production to get the struts. And we’ll show you a little bit of that. But they’re going to rest on these. What I need is we’re going to put concrete in here. And then when they cure, you know, I’ll just take and pop them out and the bolts that go in to the hubs for these will go down into that hole.
And then this will set on the bottom of the hole there for the root cellar. So we’ll just have a bunch of these as we do it. And then we’ll put dirt in and so on. And the with some Portland we got some experimentation here on this pad of what the mix and more work and how much port they need to put out as part of the experiment here.
So this will have the hubs that will go out, that will all the struts will connect there and a bolt, and then it’ll stick down and go in this hole like this and it’ll fit down in there. And that will hold it so that we can pack the mortar and stuff and have a nice thick pad for the sphere to settle on.
And then that would go up to the side. So that’s what these are for. And I’m just getting them ready to put concrete in and mix out and do that while I do other stuff later. But when these get done, they’ll get hugged and they’ll go on top of these. That’s what these are for. I’ll show you later.
Looking to occupy the land. Occupy the land. Org. Today is the day. Got everything out of the way. Donna’s off doing grandkids and so on. And by myself. I’m just going to rock and roll on these struts I keep promising. Well, we had to get everything ready to make this flow fast, and it’ll go a lot faster now.
And I’m going to show you some video, what I’m doing, and I’ll get you some details. But you know, then I’m not worried about video because I got struts to be made. So that’s what we’re going to do now. I’m going to go ahead and show you the steps and some of the things that, you know, consideration for making these struts.
And then I’m going to make them and not worry about the video. So here we go. Okay. Here’s the stockpile that I need to go through 160. And then I put 40 up here staging them for me to to cut them off. I’ll show you a little detail on that. But I’ve already done one size. Now I needed 60 of these.
So this is the smallest one. And I got the unprocessed one. You’ll just cut off the length and so on. And then did a couple just to test the stamp pass. But this is what we’re making. You know this. And you got to do both ends and then you know get them done. I put them up there and then we got to paint them, you know because when you do the stamp press it takes off the galvanized and it’ll rust and so on if you don’t paint it.
Not that it really going to rust or be a problem, but I always paint them because you need to color code them so you know which size, because a lot of the sizes are very similar. So I have all that. There are six sizes and I just did one of them. Now what I do now I was going to use this metal cutoff wheel and it works really good on you know like I’m just doing steel for brackets and stuff like this, but it doesn’t cut these as well as the cutoff blade, the abrasive wheel.
So I put them in here and then I have different sizes. Now this is a shortest one. I got to get 82 point whatever millimeters to do that. And I do it in metric because the decimal is a lot easier to it goes faster. And then I have all these different sizes. Now you can see those lines. Some of them are almost exactly the same.
But you got to get it just right for this thing to work. So I have this stop here that I made and then I’ll move it back and it has the screw holes for it and I need to move. I already finished the shorter ones. So the next thing I’m going to take this and move it back here and I’ll show you after I do it.
Because you don’t need to watch me do that. Now what happens is this.
I don’t need to cut that so I’m not going to cut. Got enough? But what that does is that cut off, we’ll cuts it down. Then I get the base of the size of the strut before the trimming. Now, how I know that is these calculations. Now you can see start from the top. It’s 20ft dome is 609.6cm, which is what we’re making.
Ten foot is 304.8cm is radius. And then the calculations go from there. Now it’s a 20ft sphere, which means I have to make almost twice as many as a dome. Three quarter inch EMT conduit for Phase Dome. Now, what I’m doing is and there’s 162 connections, which means I need 162 bolts and nuts and whatever. And we’ll show you that later.
Now I need 60 of the short ones. Now it measures hole to hole, but there’s 5.08cm of trim that trims a little bit off the end. And there’s more conduit after the hole. So everything is from hole to hole, but you have to take that into account. So it’s a total of 82.24cm which is this. So I get exactly right to where the blade cuts it.
Then I have to have 26 will make three of those. Now I get three out of all of them except a couple. I have to kind of make some of them out of some, and for it to fit, because you got the least amount of waste. Now on the short one, I have this much waste, so I’ll be using that for other stuff.
I’m always using it for stakes or something, concrete forms and different things that make use of it. Now this is how many struts or sticks is 160 that I have to do. And so I got to get on it. So that means 160 times. It’s a bunch okay. So what we’re going to do is I’m going to change this and I’m going to go ahead and show you the time lapse, probably a little bit of doing that.
And then I’ll go ahead and show you the stamping process. And then you’ll see what’s up. And it’s just a bunch of times okay. The next size I’m going to do is a next smallest one, which is this 194 the third one down. So I have to do 40 struts times three, which will give me 120. So I need a bunch of these.
So that’s going to take a little bit. So I got five loaded up and 35 restocked up here. And then I got a process of be a three out of each one of these. And once I do that then I’ll start the process on this and I’ll show you a couple little things that I have to do in trimming and so on.
And then after I show you that, then I’ll start on the stamp press processing these over here. So you see how that goes. And then I get the real work.
Okay. Now the reason I kind of dress up and trim this is because when you squish it and then try and put it in this slot here, sometimes it just doesn’t fit right. It doesn’t go all the way to the end. So I just trim it makes it a lot easier processing later on. I didn’t use to, but it’s just a pain in the butt.
So I go ahead and kind of do that. Now I’m going to turn on the machine and do a couple of struts and then you see what’s up. All right, here we go. Get it going. Whoops I turn it on.
Now this flywheel evens out the cycle on it I put this push this foot switch down here. Boom. And it’s a stamping press. Now what I’m going to do is put it in until it stops. And I’m going to squish it.
There you go. Just got a little Cooper there. Put it in here.
That trim comes off of this. Now you’re measuring from the center of this hole. And that’s why you have an inch from the hole to the end of this is an inch that you got to account for when you’re doing the blanks. So then I turn it around. Now I put it.
I bring this out so it’s flat on that. So we stay the same plane. You don’t have it on the same plane and gets twisted. Yeah. It doesn’t work. Right. So here we go.
And I do that a bunch of times. Here we go.
And now you can see what I mean about ergonomics. This door I can move on my way. And I just pull it up close here so I can stand right there. I don’t have to move. I just pick up one, process it, put it up there. Next one, next one, next one, next one. Ding ding ding ding ding ding ding.
So this is why I do this tight area. I don’t have to move. Because if you got to take more in a step man it’s too long. So I’m just going get processing these and then I’ll show you, you know, the ceiling and the painting and the bundling of them and all that kind of stuff when I get done with this size.
Oh well, most forgot. Now these are flat now because it’s a sphere or a dome, you have to give it like a level and degree bend in a little bit. And I’ve been doing this a long time so I know. How about what that is. You just put it in here and bend it about that much. You know, it’s like 11 degrees because, you know, it kind of curves around as you’re building the dome and, you know, you get it about like that and it’s all good.
If you don’t do it. It’s a pain in the butt. You’ll remember you needed to do it later. So after I punch it the last time, I just beat them like that. That’s it.
Now, this kind of seals it back a little bit. And it also color codes it because these smaller ones are yellow on the assembly diagram. So you want to match the colors so you don’t get confused on that before. And so this is the final step you know before we start assembling them. And that’s it. So these are yellow.
The shorter ones they’ll be the center star at the top of the dome. And I think there’s five others. So 30 of these now I got like a gazillion more to make. But that’s it. And we just start bundling these and I’ll put them on a pallet and then we’ll just go ahead and take them over to where we need to assemble it.
And I got a bunch more to do, different sizes. And that’s how it’s done. Pace. Well that’s how it’s done now. It took me. It’s been about an hour from the time I started doing it. So to do cut 30 struts, punch them out. It’s about half hour to 45 minutes. So time six you know. So I scheduled myself about ten hours of doing this.
But once I get everything ready, you know it goes pretty fast. It’s just you get to stand there. But I got myself a chair, so, you know, I might be able to sit down and do it now that I got it all close and everything. But you can see from you have everything ready from having the conduit to creating a half of one of these.
You know, a dome takes about a few hours. You know, there was, you know, one guy came and I used to run out my stamp press for other activists that wanted to do these. I said $200 a day, and he stayed up all night, did five domes, about 3 or 4 different sizes. So, I mean, you can punch these bad boys out.
You got it set up. Right? So I just wanted to let you know we’re going to be doing like, a lot of structures out here this way and masonry over it. They’re not going anywhere ever. We’ll be showing you that next time when we get these all processed. Then we’ll start assembling it in the bottom of the root cellar hole there.
And you’ll see it’s going to be coat there. Coat. Okay. I’m going to later do a video on this with clear. But so you understand what we’re doing. You go to Desert Domes and go to the dome calculator, or you just put in Desert Dome calculator and it’ll blow up on your search engine. Now what you do is you put in I do centimeters instead of feet because, you know, two six of a foot pain the ass.
So I use metric. Now a 20ft diameter dome is ten feet radius. So it’s 304.8cm. And then you can’t hit enter. You got to hit that. Click the button submit and figure that out. You hit the button submit. I’ve been using this for over a decade and a half now. A four phase dome. How it looks is like this.
If you go to the dome calculator, boom! You’ll see. All right, one phase. They’re all the same length struts. Two phase. Do like not very strong really long struts. You like, you know, dog house or hen house or something. You don’t need a lot of strength. Three phase. You’re starting to get there now. I do a lot of three phases.
You’ll see three phase domes being used for greenhouses, a lot of stuff. Usually they’re 16ft diameter because a ten foot piece of conduit, you get maybe three quarters of an inch left over after doing it. Now for phase, you’re starting to get, you know, strong. That’s what we have for Phase Domes that we’re doing our prototype out here.
And then five, six miles will be Epcot Center. So we’re doing a four phase dome. Now we click on that. And then it was was it ten foot is 304.8cm. Submit and you’ll see the sizes. Click in here. So this is from hole to hole. So when you do the struts they’re like two inches longer than what this is which is five point whatever centimeters.
Now this is what you do all these calculations and I’ll show you this real quick. We’ll do this better another time. But conduit dome tip. Now this is we did our first one this way manually. We sledge hammered it. We drill pressed it. I mean, you could do this, but we got a stamp machine to make this go a lot faster.
You’ll see that, because that’s like. Damn, now you’ll see the measurement is from the center of the hole to the center of the hole. Now, there’s some trim that you know, on the now hours. When we do it, it curves it and it rounds out this. It flattens it first and then it punches out the hole and rounds the ends.
You may see on some of the close ups of our dome, but this is why hole to hole you got to add two inches for this trim that it does here. And we do that in meters. So you go to Dome calculator for phase 304.8.
I’m telling you you do this in metric. It’s just so much freaking easy or it doesn’t work that way. 304.8 submit. Then you get the sizes. Now if you do a dome, you’re getting half of it. So you have this mini struts this size. If you do a whole sphere, you need of course more. Now the connectors, how many connections are there?
There’s a total of 162 connections, these hubs. So you need 162 bolts, nuts, washers to put them together. So that’s what I’ve been sitting here working out, figuring out, you know, what I want to do. And so this is the pirate book. I’ve had this for God over a decade or something. So this is where I put all my you can see old calculations and, you know, different plans for different domes.
Been doing this a while. So let’s see, where is the one I’m doing this one here. Now we’re doing a sphere, not a dome. So it takes, you know, a lot more struts. This is what’s going in for the root cellar. Now what you see here is that is the hole. The hole. And these 60 A’s. B’s 120 sees D’s.
That’s how many struts it needs. But you got to add 5.08cm which is like two inches that you add it’s like you know 1.5in is a.
No. It’s 2.5cm/in. That’s what it is. So five centimeters you add now this is what I have to cut the struts to. Now I get a ten foot.
EMT conduit three quarter inch. And what I need to do is figure out I can’t get it as big as I can without wasting a whole bunch. So at 20ft or 609.6cm, you have 60 of the ten foot, I make two D’s which are 100.44, and then I get left over 69,609. So there’s the 60 I need there and 120 there.
Now in others, a lot of times different sizes, you get all kinds of, you know, funky and different, you know, combinations. I can show you other formulas, but basically this is what’s going on. 26 I can get three of those 80 twos, so I get 60. Do the same thing there. 43 I can get 94.85in, I can get three sticks at s, I do 40 gives me 120, and then 20 of that one will fit on a stick.
It’s only this one that I got to get funky a little bit to be able to not waste a whole bunch. So it comes to 160 sticks. Now these, you buy them in bulk or whatever. It’s about ten bucks. I remember when they used to be like $2 or something. I mean, it’s got ridiculous. So 106, that’s like it’ll be discount.
It’d be like $1,500, $150 in hardware. And you go to McMaster car and you just order a bunch of bolts and nuts, and I already have preorders. I know what I need. So this is the actual hardware that I need. So for doing this big ass sphere root cellar is going to cost me, you know, about less than $2,000 and a bunch of hardware and everything.
And depending on how much Portland I use and I got an idea for insulation, a bunch of it’s going to be, I don’t know, maybe $2,500 if that. But it’s going to take time and we’re going to we’re out there now that I got to, you know, take, you know, the tractor and get it. But what I’ve been doing is taking Donna’s water station.
She has out the garden and spraying it to kind of soften that up and form it to this size. So that’s what we’re going to be doing. But I had to do this and decide all the equipment that I need and order everything so that I have it ready to start putting together. So that’s what we’re doing. Just wanted to show you that real quick kind of get an idea of how we make these domes.
Now, one other thing. When you go to the dome calculator, you go to three phase, which is kind of popular. Then you have there’s different domes. You have like a 3/8 dome, a 5/8 dome and then the sphere. What that means is to hear here up, that’s a 3/8 dome. And from here you go from the bottom up.
That’s a 5/8 dome. I don’t know Marco over my screen, but the. So that’s a 3/8 or 5/8 dome. You can do that now because this is a line that goes across here. You can do that now on the other side domes. You can only do a half dome or you do the sphere. Now the reason that’s important is sometimes you don’t want a full dome, you just want to cover a roof, an area, and you can just do that with kind of a semi domed roof.
So we’ve been doing this over the years a lot. So, you know, I’m familiar with it. I know what I need to do and just sharing with you you go to Desert Domes. Com and then you go forward slash dome or whatever. And you get to the calculator here and you can have some fun, but you really need that stamp press to make the struts go faster.
You’ll be making struts for the rest of your life pace.
https://www.bitchute.com/video/ZX2qaq8BmJlL
Root Cellar Strut Production: EMT Conduit & Stamp Press Demohttps://t.co/KYmUlCbPTs pic.twitter.com/VwSHFlXC2W
— occupytheland (@occupy_the_land) May 30, 2026
Welcome to Occupy the Land. After the rain we walk
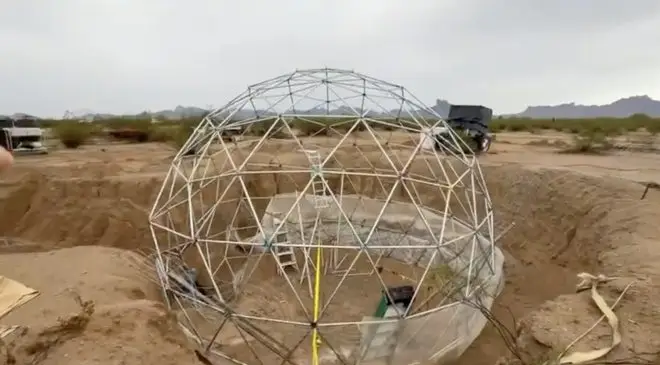
Welcome to Occupy the Land. We finish the top half
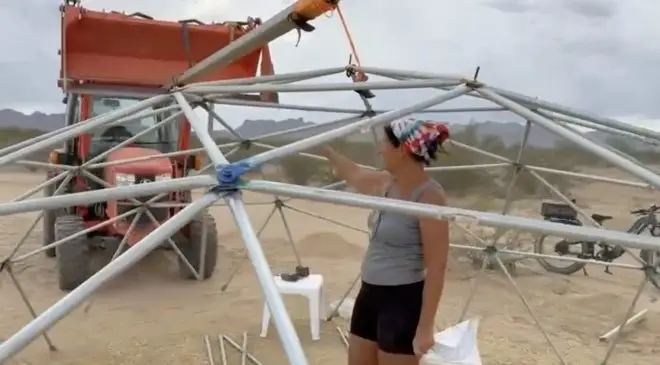
Welcome to Occupy the Land. Donna and I assemble the