


Homestead Progress: Sphere Fabrication & Predator-Proof Coop
In this episode of Occupy the Land, we advance two
In this episode of Occupy the Land, we finally fire up the heavy equipment needed for the root cellar project! Ernie tests and sets up the welder on 220V, then brings the massive vintage stamp press (a WWII-era machine) online after maintenance, greasing, and motor/belt upgrades. He demonstrates how the press flattens, rounds, and punches precise holes in 3/4″ EMT conduit to create the struts for the 20ft geodesic sphere that will form the underground root cellar. With 160 struts required and color-coding for different lengths, this is the key fabrication step that enables the sphere build. We also discuss the need for a concrete pad outside the shipping container workshop to make future steel work easier. Steady, satisfying progress toward cool, long-term food storage in the desert! Peace.
Transcript:
Okay. What we’re doing now, I want it’s time for me to set up the one where we got a couple of things to do, and it’s time to start doing, travel and all this other stuff. But we got to do the, straps for the dome first. But I need the welder. So I’ve had it for a year and haven’t used this one.
But I have one like it. So pretty similar. It’s all loaded up, and I got the 220 that’s running out here with me running everything on 220, and, I have it all set up. I’m gonna turn it on.
I’m just going to make sure it work.
No glasses came with it was a problem.
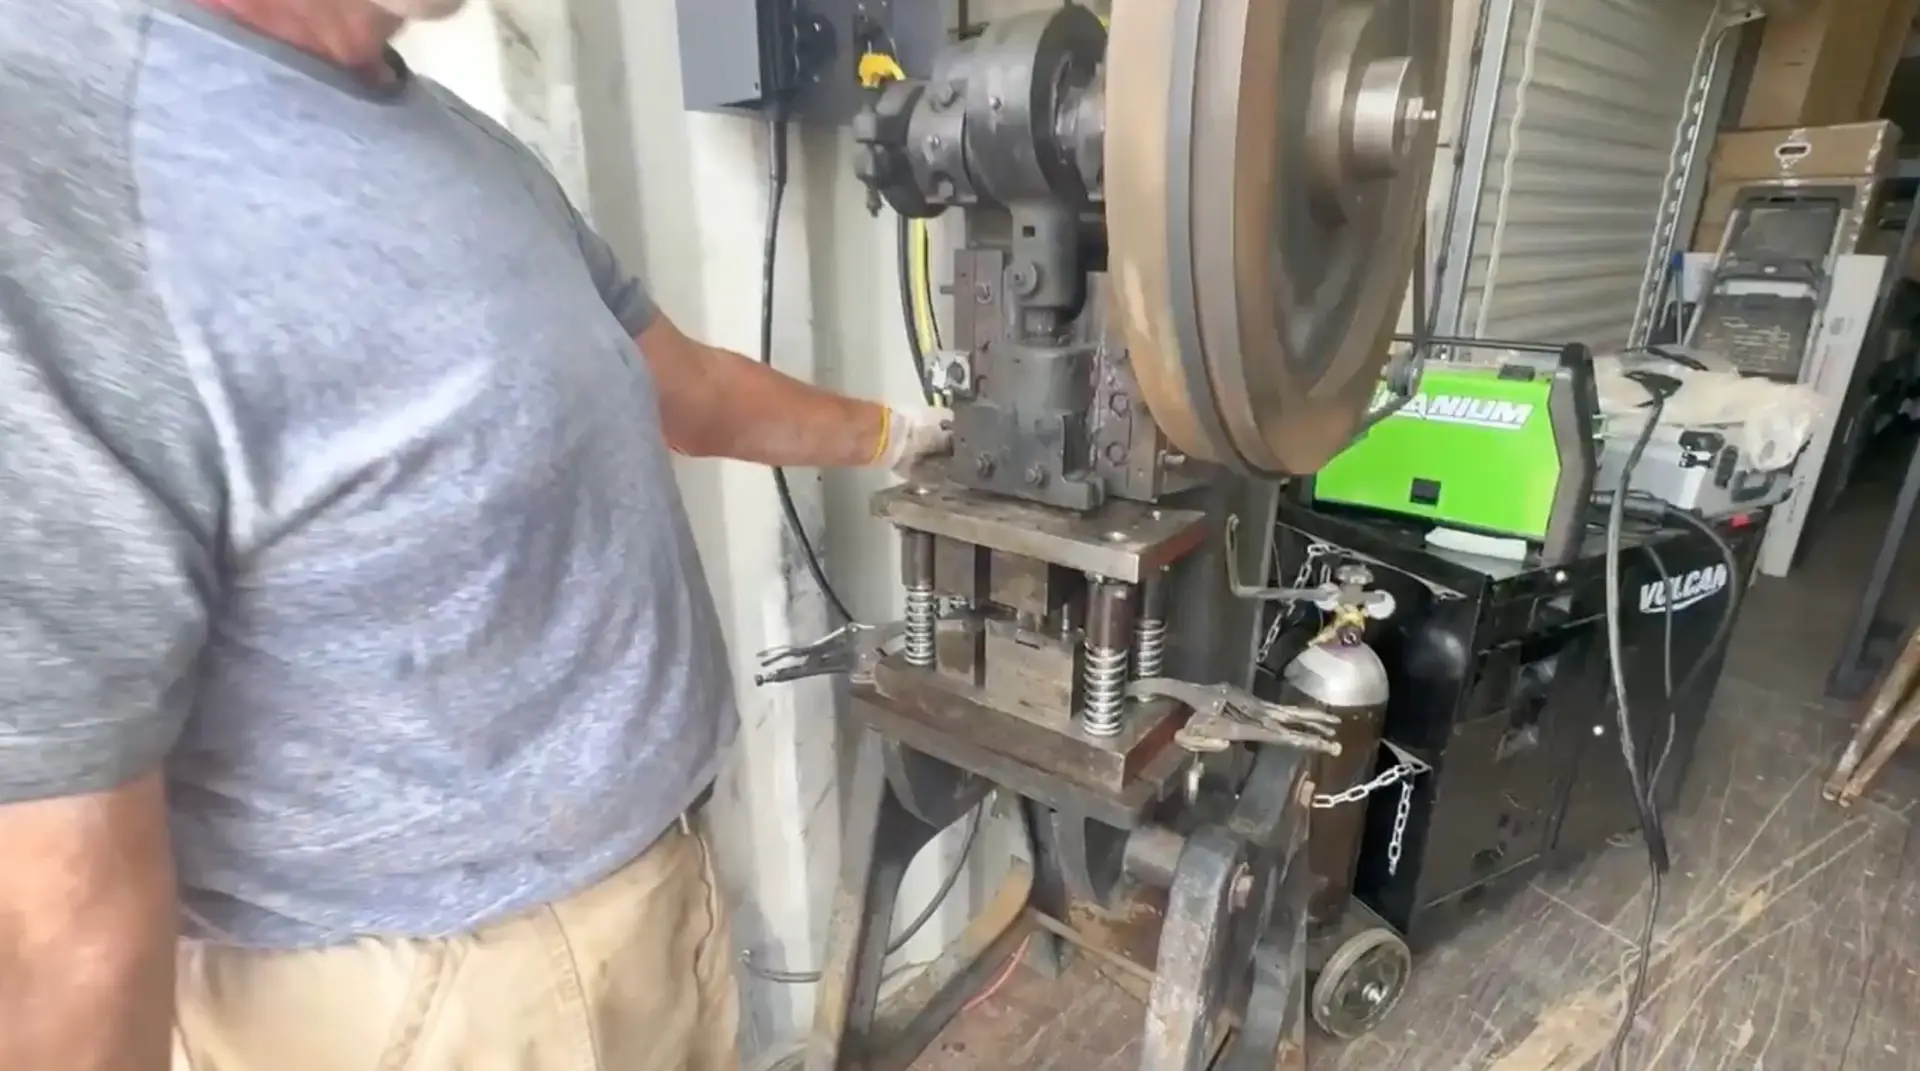
Boom. All right, so it works. We’ll play with it later. But, Hey, all setting done. So I just wanted to make sure it’s fading and that, and current and so on. So we’re good. All right, so we got that set. Now the one thing that is the next step, this is the stamp press. Plus the welder.
And little plug in 220 year old.
Okay. This is from the car I don’t know World War two punching out b29 parts or something. So that was all. Well we got it. Now the meat of this thing is coming around here. What we had to do is change the motor. I want to get a new motor on there, make it 220 new belt. I have it all set up and so on, and then get it to where it starts punching.
Now this is what it does now I have the die down here and that’s what we’re going to videotape putting that up. You know.
In this bag. Oh that is the die okay. Well we’ll get a good look at it here a little bit. So I had to grease it. I had to fix, you know, the the hub here. Just some maintenance on it. And it’s old beat up, but it works. And this thing has been at least 1,000 pounds. Three guys cannot move this thing, you know, four guys in kind of boot.
So I use this big giant car and put it underneath, and I move it like an inch at a time to get it where I need that on the forklift. So we got it here, this angle that I want to do it, I just want access to. And then we have to turn that off the switch on the side I need to do you know, so we did a two pull switch on that and change everything to 220.
And it will start and I’ll show you what it does. And then we’ll put the die in and we’ll go ahead and try, doing a little stamp on something so you can see how it works. All right. So we’re going. Well, turn this on. Okay. Now, when I hit the switch, this is going to go to trunk.
And that’s how it does work. So I spent the rest of my life to a trunk. Is it?
So what we’re going to do I did this last year. Had it all set, ready for when we got to this. And it started going to clean it up.
Enhancer doesn’t move, flattens it, rounds it, and punches the whole. So we’ll get a piece to show you here a little bit.
There. Boom, boom. That’s how we make the springs. Make short work of it. We’ll show you. We’ll do one here in a little bit. So you see how it’s done.
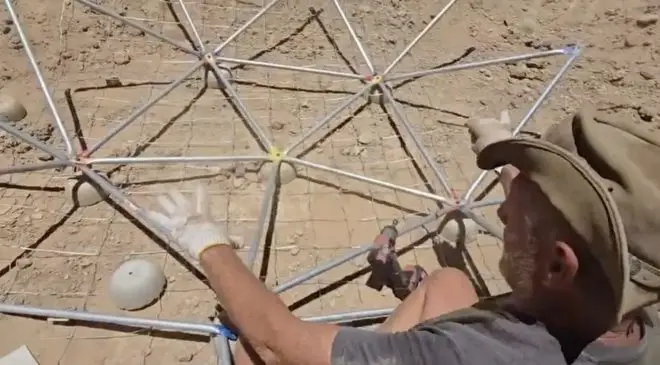
This is 160 three quarter inch. This is going to make the steer to do the for the root cellar over there. Now you get about half of these, you know, you need to do a dome, but we’re going to make a full sphere out of this. So we’re going to process this into a sphere. Now this cost about oh, it was like $1,500 worth of stuff.
But to make up the building that we’re doing, it’s pretty cheap. Now, this, half inch we use these on smaller domes like, 16ft domes at, you know, three usually. But maybe for phase that you can get a nice chicken coop or greenhouse or something like that, what you’re going to be doing a lot more. A lot of this stuff is temporary but semi-permanent that it’s going to last.
But, why don’t you see? We start getting into these? You’ll see why. Now, this is how me.
You know, these struts start for another 30ft dome. We already have ready to go. So this will be part of one of the builds and so on. Now we color code these because they, are different sizes and you get confused if you don’t know what colors are there. So here’s a closeup of it. So what we’re doing is it flattens it.
It makes this curve. Then we put it in the other one and it rounds it and punches the hole. So this is three quarter inch. This is half inch. I just have this extra half inch one. The dye that’s on there is not set to a half inch. So it will be loose. And everybody is going to show you how it works and makes this.
Now I’m going. All I’m going to do is go boom, boom. And then you turn it over. Now to keep it flat. That’s why we have this, roller thing here.
And it’ll be set up when we get it size and it’ll be lowered to go level. But the reason is, is because when it’s flat and you put it flat over here and you put flat and it’s here, it maintains the same plane. So we do this, we put the flat on here and that’s how that works. We’re just going to show you when we get into real production give you a time lapse on it.
But here we go. Now, we’ve done this before, showing on a channel here.
Close up. And a flat jet. That’s it. And then you overlap. These will tell me how you can see here. We put it in the right plane. Well, that’s why we use that roller.
00:09:28:28 – 00:09:34:10
Unknown
Boom. This is the trick.
Now the hole is too deep. Measurement for this is done from hold the hole. So you have like an inch trim. Yeah. This little trim. And it’s an inch from the stock that you cut. Now how do we cut it. Now this isn’t set up yet but this right here, this blade.
We put up the ten out of time here, and we just chop them and we get in the way. So that’s what I got to do. You know, in the next day or two, I have to set this up for cutting these struts. So we just got this going. You know, I do, you know, change stuff on and fix it and whatever and rocking and rolling.
But that’s what we’ve been waiting on all this time to get this thing back out. So we can start making the struts. And that’s how it’s done.
Hi. Welcome to occupy the land. Occupy the land board. We’re at the stage now that I really need a concrete pad that’s going to be in front of the shipping container where I’m doing the struts for the sphere, for the root cellar. So, we’ve been putting it off, you know, it’s, you know, it’s on the list is down the list.
I got a white board up in there. I gotta make a list. So, right now it looks like what’s going to make everything go a lot easier is me build up a pad outside. There’s two doors, the roll up door and the, in door on the one of the workshops, a shipping container that has the stamp press for doing the struts, the EMT conduit for the sphere that we’re doing the root cellar with.
And I have a welding table, I got a bunch table I got, you know, by I really need a flat, concrete place to work on storage there. Just make it a lot easier and go faster. And a lot of these things, you know, because you’re in a hurry to get a lot of this stuff done. You do those things first.
But this could have took half the time if I’d prepped. So I’m going to go ahead and do that. And today star start, part of that. Now I need more soil to pack there to do the framing, the forms for doing the concrete pad. So I’m in the sand pond area to where we’re doing that. Now, the problem is, is I need to separate the soil.
I need to get a lot more gravel. And so and I don’t have the trommel done yet because I don’t have a concrete pad to make the trommel. So that’s why we’re doing that. So we’re going to go ahead and work on that concrete pad. Now I have a water source over there. I’ll get one of Donna’s hoses.
I might even need a pump, I guess from gravity feed. They’ll probably just keep it where I already dumped a five gallon bucket on it just to make the soil that I get here. I got the compactor over there. I’ll compact it and you’ll do that. But what I wanted to show you, I’d be processing some of this dirt, get some of the gravel that I need, because I can do it in a, small separator, expanded metal thing that I got over there to do that.
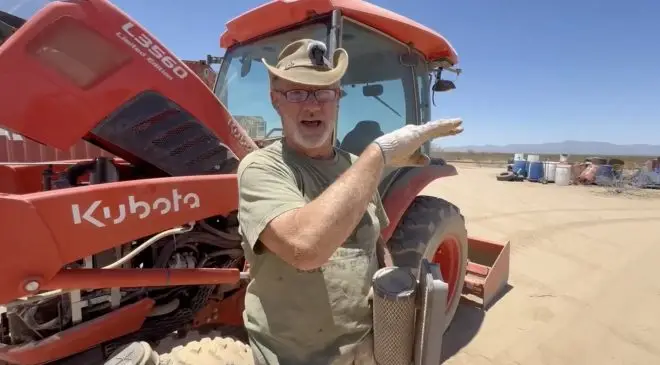
But, man, I keep talking about that trommel thingy. Here comes. So what? We’re going to, I took the Ripper. I’m going to show you here a little bit of the deeper. It’s been months since there’s any moisture down here. And just a couple inches under. It’s wet. And this is why we want to retain this water.
So that on the upper part, the terrace that we have back behind me, there’s going to be, an orchard, and you can see how much water you can retain for how long for trees. And that’s what our goal is. So I’ll show you that here in a second.
Now over there is the pad for the home is going, and a lot of the dirt that we get from here from the Sam pond has been to bring that up, you know, as much as we could. And then of course, from the sphere that’s over there, the root cellar, all the dirt that was down there, we put over there as well.
Now, what we’re looking at here, here is where all the water drains to this upper terrace part. Here is where the orchard is going to go. You know, a lot of trees and stuff like that because all the water drains to there. First it’ll soak in and then we have this, this dike that we’re, building up, as you know, we can, this is what’s going to retain all this water here, and then it will have overflows on each end of this road that will go.
This is the storage area. Now, you know, we’ve been working on this as we need soil and when we got time and so on to spend a year of piddling around. But you know, now it’s going to start getting serious because in May it looks like we’re going to install the water tank that goes down here. Now I have rippers on the back of this back blade.
They rarely use, and it’s time to use it. And what I do is I had them lowered down to really rip into this. But look at this. There hasn’t been any water down here for months, like 25. And you can see.
The moisture that’s just below the surface, this is what we’re going for, is that we can charge this soil. There’s hundreds of millions gallons of water that’s down here, and you can put it in the right place, and you get a little bit of rain every few months. Boom. You know, so that’s what we’re doing. That’s why you have such a large area for water retention, for growing.
Now for Donna and I just a live you know, we just need drinking water. We’re getting the filtration system and pressure pump and all that kind of stuff for us. But the vast majority of the water is just for agriculture, for growing trees. You know, we can filter it for health. The pool water. We have a we got a new sand pump for the pool test out, out and that worked really well.
And I have another one that’s a one of the shipping containers over there that I got just for this. You get muddy water. Well how clean can you make it and how much filtering you gotta do and how much settling you have. And on and on and on. We’re playing with that because there’s so much water available. The reason we chose this land was because all that water comes down, these 4 or 5 washes that just I can retain it all, even if it’s just raining on my land.
I mean, I burn it all up and I still have enough. So we’ve seen how this works now. We had this flood probably five, six months ago. You can look back and see where this had water in it. And that water is just soaked down here and it’s right there. It’s not that deep. Now if I, you know, go ahead and just dig down a little bit and see what we get.
Yeah, there it is.
I don’t know if the camera picks out, but you can see the moisture in there. Let me see if I can comp it up.
Yeah, yeah. Comes up. So that’s what we’re going for. So this is just to show you what’s up. Now I’m going to take this now. Fortunately it’s moist. I’ll, take a couple of buckets of this and go put it on where I want to do the pad. And I’ll compact it and rock and roll and whatnot. Piece.
Okay. Now, this shows you the moisture that’s down there. And you see that calcium, those white streaks. This is Khaleesi. Now, this is one reason why we needed to pull the soil out of the Sam Pond area here. Is because we took all that hard. Khaleesi softened it up back hoed it from the root cellar, and we put it over on the housing pad so I can’t get that back.
But I knew where I could get some here because I had had a ordering I did here, and it hit that hard, Khaleesi. And it just stopped. It just had the auger, that drill, it just would not go through it. So I learned that, you know, softening it here, it’ll can be dug now, but this is the same stuff that that hard stuff.
But when it gets moisture it crumbles and it makes really good Adobe and it smooths and then it hardens into like a concrete. So taking this from here and using it to fill in the root cellar in and around the struts. And the hog fence for the root cellar is what we’re going to be using. And it’ll just be like concrete.
But it’s softer here because it’s got that moisture. So it does retain the moisture, but you want to keep the moisture away, you know, as much as possible from the root cellar. So we got drainage and stuff for that. But you can see this is my point. It is months, five, six months is like, you know, I don’t remember the last time there was any real pooling down here, like September, October.
I mean, it was a long time ago, so it still retains it. This is what we’re counting on for growing, but we have to retain all the water that comes across the property from those mountains. And it happens several times a year. We don’t get a lot of rain, but it all comes at one time, and they’re predicting that this year is going to be a heavy monsoon season in Arizona because of the, I don’t know, whatever temperatures the Pacific, El Nino, El Nino, there’s always, you know, something.
So that’s what we’re preparing for. Now I’m taking this dirt and I’m going to take it over and use it, especially since it’s just Khaleesi stuff and it’s moist. I’m going to put it over there to build up the pad to do the concrete. So that’s going to be done for the rest of the day.
Okay, you can see I need a pad outside the rollup door here, because this is the building that’s going. It’s 22ft high, 30ft wide and 60ft long. That’ll eventually go here. So I don’t want to spend a whole lot of time when I got to do the concrete in here, anyway, on a pad there, but I may do you know, a little semicircle out there and make it.
But what I really need is what I’m doing is here. So I take that compactor and I’ll just compact it down. I’ve already done, you know, this from before when we made this ramp, because this is elevated. We put up on railroad ties. You can see down here the railroad ties that we leveled and lasered and so on, and had them drop it right on it, both of these.
And then we had to raise up a couple of feet this pad in here. So this is setting up on a kind of a high island. And this is ramp and down the hill to the road level. So I dampened this just cause. And then I just pulled a bucket out and I’m doing final 4 or 5 buckets or something.
But you know it’s moist and it’s going to pack very well. So I’m looking forward to doing that. So I’m going to go ahead and dump this. Then I’ll compact it and I’ll do that several times. I just wanted you to see where I’m putting it and why and what I’m doing with it, because this will harden into hard and it’ll be compacted.
And then I’ll do the framing for the poor. And then we’re going to be doing concrete with the mason. You know, bucket that’s over there. So a lot of stages and it’s a lot of work you know just for you know a couple to do. But we know what we need to do and all the time that we have to do it.
I mean, we make quite a bit of progress each week. I got the, you know, I don’t know if I showed you that.
I got this ready to start processing the EMT conduit. I have the stop, you know, for the sizes that we need. And I move that each time I do a different size. And this cut off metal wheel, I used a, abrasive disc before for God, using thousands of these struts. This is the crap I am, man. Where have you been all my life?
So I got a new cut up wheels, a 14 inch so it could take a metal cut off blade, and that makes that a lot easier. So I had the plasma cutter over there and the welder and then over. There’s a welding table and got the stamp press going and everything. But I’m right up against the edge and I need to bring stuff outside anyway.
So I need a concrete slab here, make my life easier and give me a lot more working space. And then we’ll put up, shade cloth that will be hung from there. And because we’re on the north side of the building, so there’s always kind of shade right here anyway. But I’m going to angle this out kind of like a pie section that will go out over there and over there.
And I’ll put some of those aluminum tubing, square tubing out there, and we’ll be able to stretch out and have shade cloth, you know, to make this better for the summer. You know, we got plan on it getting hot in early March. It hit 105 108. And I thought, oh, little summer’s here, I guess. And then, you know, for the next month or so, it’s just been awesome.
It’s been beautiful. So we got a dose of June weather, you know, before, and it wasn’t that bad. I I’m going. Yeah. It’s not that bad. We got a lot of shaded area now we’re making more and so on. Things are getting more comfortable and we’re having fun. And this is the look of the valley on the north side of the property piece.
Root Cellar Struts: Stamp Press Demo & EMT Conduit Fabrication https://t.co/wLRQWN1uCv pic.twitter.com/yegO9WqIWN
— occupytheland (@occupy_the_land) April 18, 2026
In this episode of Occupy the Land, we advance two
In this comprehensive update from Occupy the Land, Ernie walks

In this episode of Occupy the Land, we welcome 15