Earthbag Progress: Cleats, Straps & Ready for the Dome!
In this episode of Occupy the Land, we resume the guest dome build after a busy stretch of other homestead projects! With cooler weather finally here, we prep and install heavy-duty hurricane straps (mule tape-style) between earthbag layers to anchor the future dome roof securely to the stem walls via a planned concrete bond beam—over-engineered for wind and microbursts. We also place cleats and conduit for outdoor outlets, reinforce door frames with cement-heavy hyper Adobe mix, and get laser-level serious about plumb and level as we lay the next course of bags. With three more layers targeted before windowsills and dome integration, we’re excited to move fast now that tools and workshop are ready. Join us for hands-on progress on our experimental dome while the desert stays peaceful and green! Peace.
Transcript:
Part of what we did today was get ready for tomorrow. And what we’re going to do tomorrow is lay another layer of earth bags on the wall. We haven’t done any of this for a while. We’ve been busy with so many other projects on the homestead, but tomorrow we’re going to start laying more bags and hopefully by the end of the week we’ll get another layer on as well.
So we’ll have two in the next week. And what we have to do tomorrow as well is lay the hurricane straps down. So what kind of go through how that works and what they’re for and everything. It’s just like this really thick neural tape that you lay down. And it’s a way to anchor the roof into the wall, into the earth bag wall.
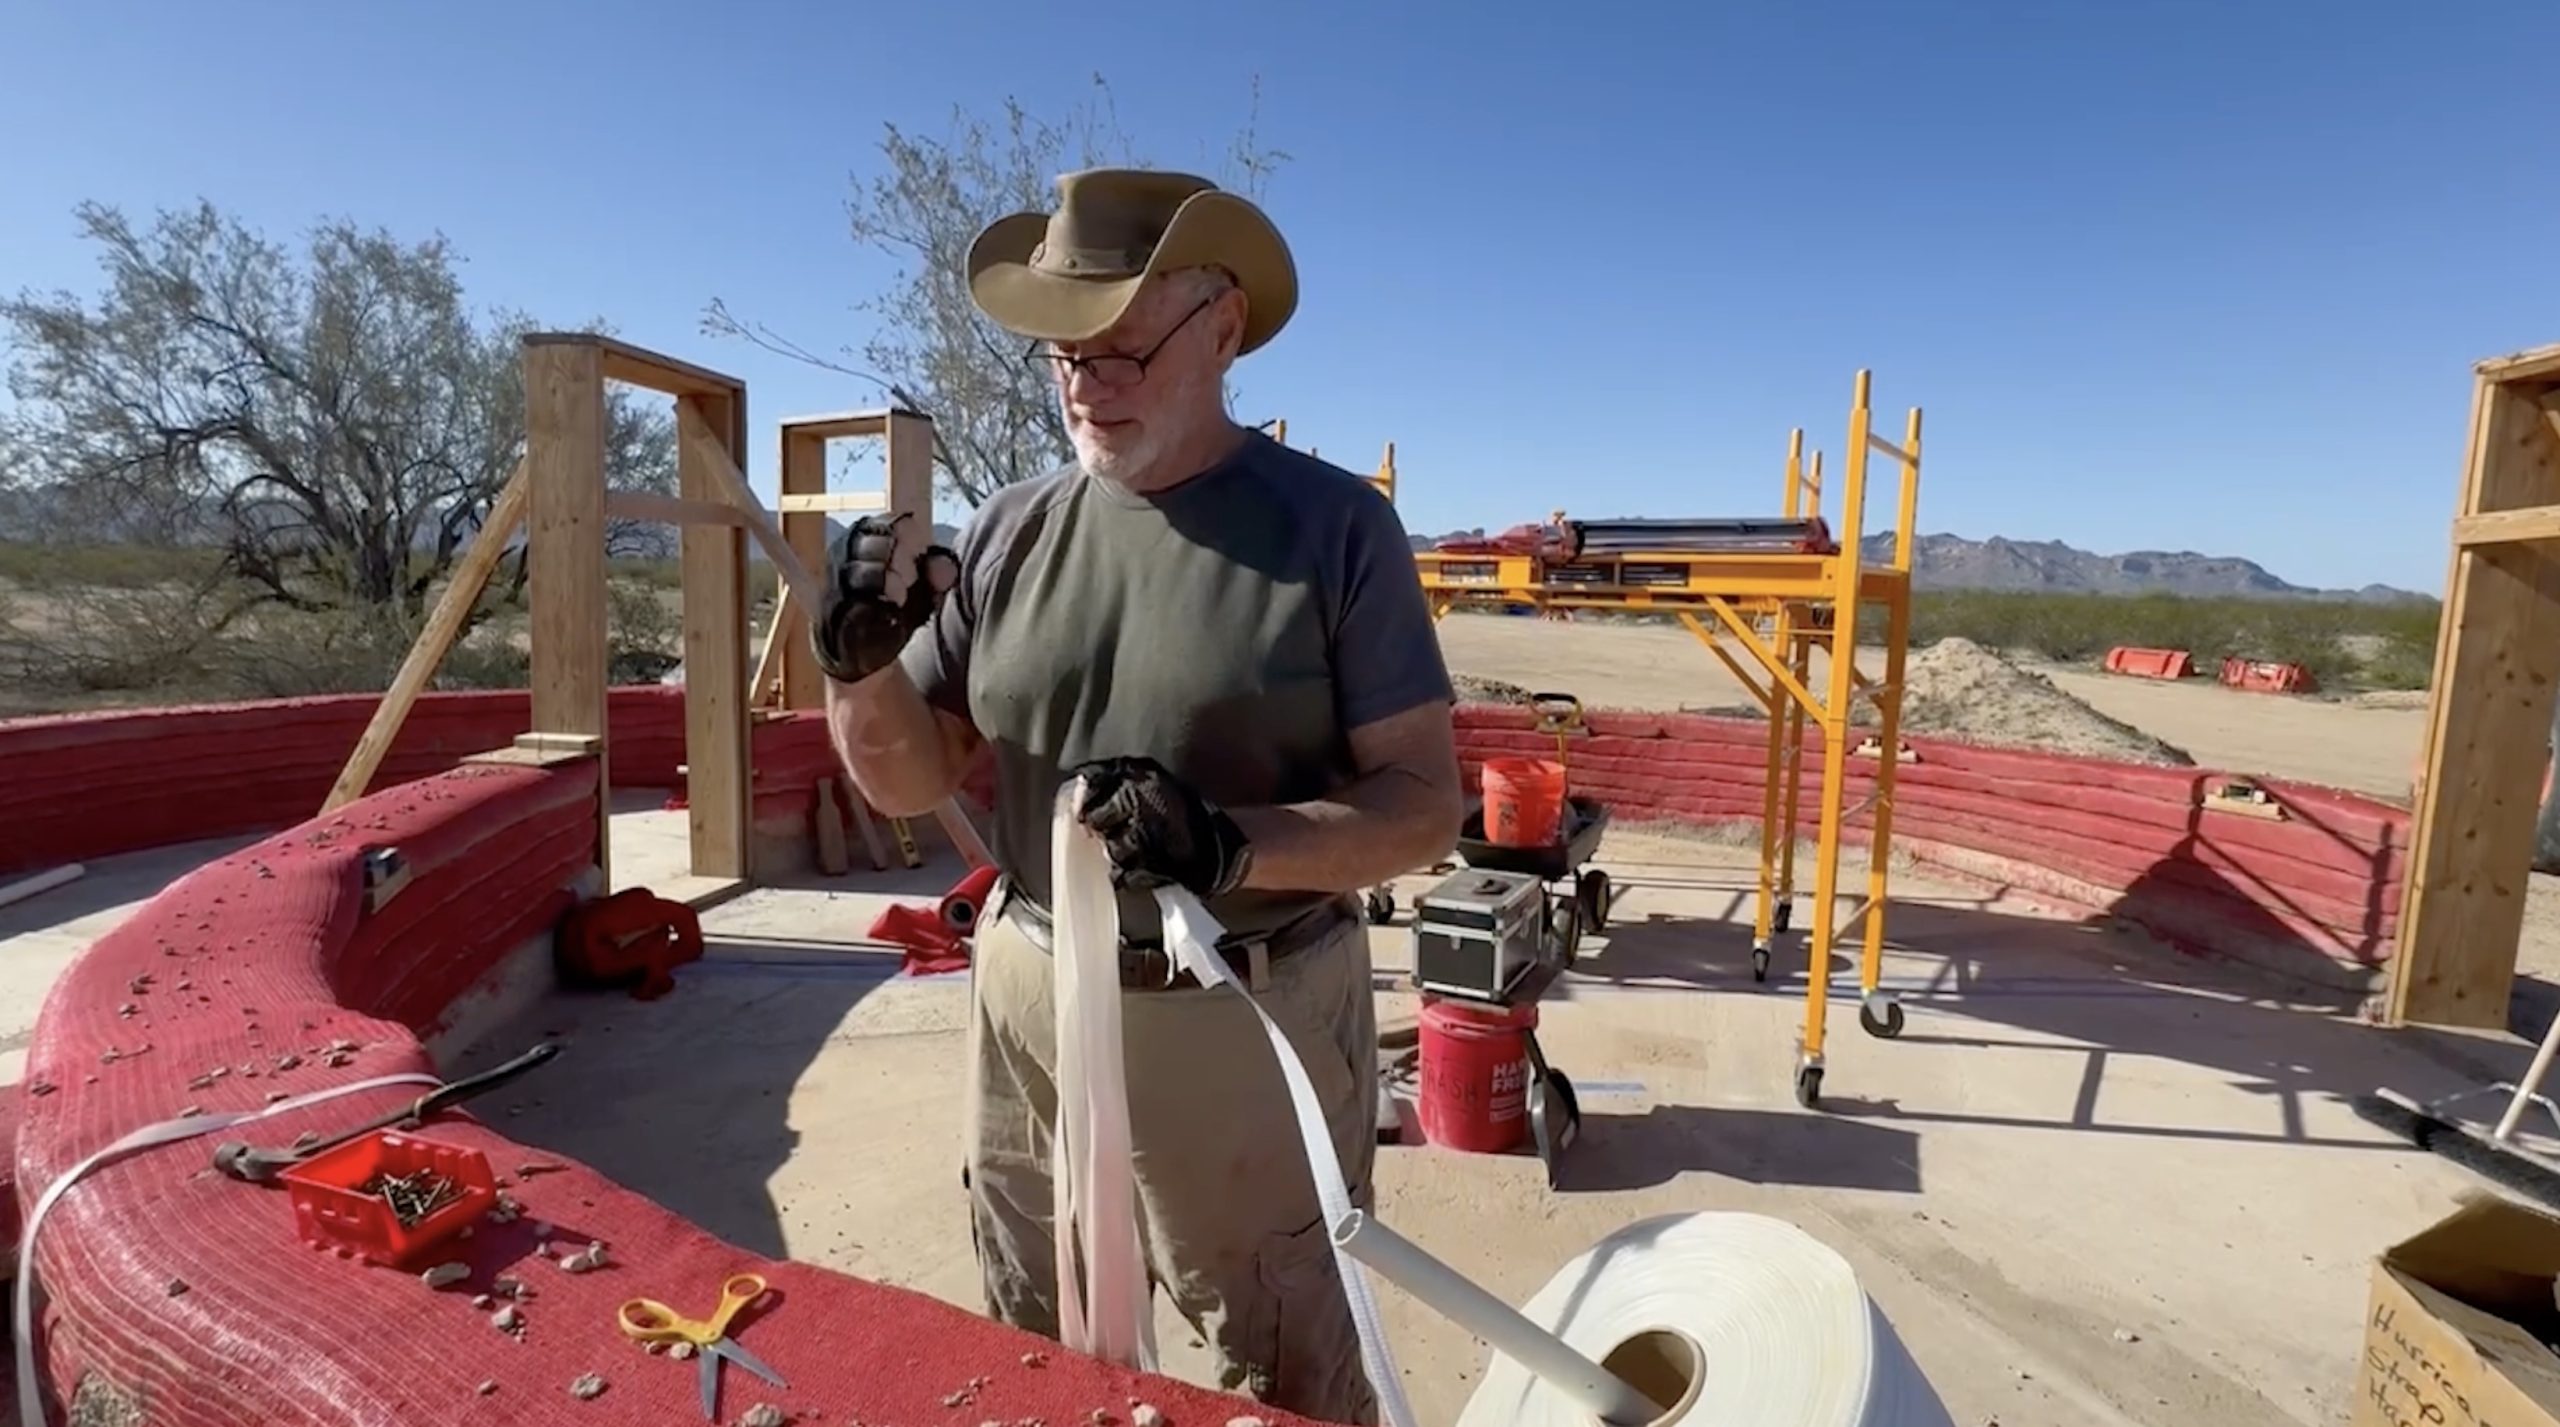
Ernie’s getting the hurricane straps ready. What these are is kind of a it’s really heavy duty, strap like mule tape that we put under the earth. Bags would go several layers up, so it will. This is what will anchor to the dome once we put it on top of the earth bags with a cement bond beam with rebar.
We’ve down the bottom of the dome and that’ll be enough. But this cinches it down with at least three of these bags. The weight, of the cement being bond beam, the roof, the dome, and this cinch down hold the weight of three of these bags. So no matter what, when they’re, it’s not going anywhere. I just saying just in case we get a hurricane in here, which happens that they’re called microburst out here and it’s coming.
It’s going to be like but then about a month or about six weeks, it gets really windy.
Okay. Now what we’re doing is secure in these down so we don’t have to worry about it as we lay the bags. And we’ll put them about every three, two, three feet or something like going to get anal about it. It’s all experimentation. Now here when we go with these cleats up against the door frames, this has Portland in it.
So it’s like cement. And we’ll see how far the cement goes back here. We usually just do it for a couple of feet. Now this Adobe I mean it’s hard but it’ll take a nail. Now when I go over a little bit more. I’ll try and put it on the cement, you know, comes over. We’ll see if we can.
Not good to. So this is cement here that we bond this stuff into so that, it doesn’t shift in the door frame. So when we start doing the bags, the first one, we’ll make a smaller batch of it and we’ll put concrete in it, and, that’ll sure this up and it’ll make it to where it’s not in to Adobe just to secure the frame better.
But, yeah. No, it gets hard. The Adobe that we’re using just for soil from the land is way good enough. This is 16in wide. This mass is what’s going to regulate the temperature. And, we’re looking forward to this. This is an experimental dome. We’ll be trimming up some stuff, learn some stuff, do some stuff. But yeah, no, this is way over engineered.
And I’m sure.
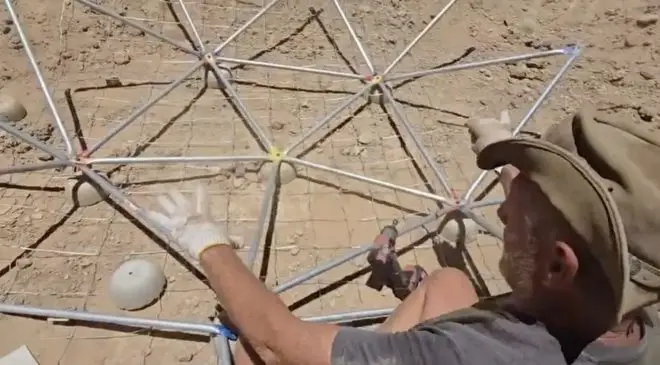
You know how this works. This tool threads these in and then this clamps, you know, you put it in there, you get it up on where it’s going to be and it wraps over. And then you sense the crap out of it. Boom. And it tightens it down. These are used generally for big pallets and shipping and so on.
But it works perfectly for this. This is tiny shiny homes, where we bought the bags and we did some workshops there. And this is what they’ve done, and they made sure we got the right stuff and everything for doing it. So this is I don’t think it’s overkill, but it’s definitely, you know, making sure it’s not going anywhere because once we cinch that, do the bond beam and cinch it down.
And, then we got a hard platform, do the ceiling, the roof, what? It’s going to be a thing. So we want to do this now because we’re down to probably the last three because the window is going to go, you know, about here, you know. And we’re looking to put it in a steel frame so it can bend out and do service from the kitchen, because this is where the sink is going to be.
And the window goes about here. And then we that’s probably going to go I mean, I need to scrap. I put it in the middle of the window, so. Well, oh, is it going above the bags, or into the frame of the dome. The window. Because it’s cold. I don’t know yet. We’ll put it back, but.
Well, we can put it in and always cut it if we don’t need it. Yeah, but not to have it would be we’re just going to go around and put it. The only thing is that it’s difficult to put them, you know, within a couple of feet of the door frames because that’s concrete. Now what our big thing is, we’ve got the laser level out or needing a start to really get concerned about leveling.
I mean, it’s pretty level. It’s within half an inch or so all the way around. But, now that we’re starting to put in frames and so on, we’re going to need to make sure that it’s, you know, plumb on the outside and level on the, on the, top of the bags. So that because that’s one thing that we’re learning is, even with the chicken coop and doing a little stuff, if you haven’t level in plumb, it just makes everything easier.
Everything’s the same size you do. So on and you kind of customize it and we get around that. But, you want to make it level and plumb and it makes it a lot easier for, you know, having uniform two by four, construction on the inside wall or putting cabinets and, and so on. So you can adjust for it.
But if you don’t have to, you don’t have to. You spend a little bit more time now. So that’s what we’re going to be doing. I’m just going to put these all around. If we don’t need some of just pull them up or cut them or whatever. So I’m going to put more down than probably what we need.
It’s cheap so I don’t care. So that’s what we’re doing now. And once we get this prepped on then we’ll start filling the bags. Now the first ones we’re going to put a little bit of Portland in it. And so on to really firm it up where the cleats go in that the frames screw into. That’s how you attach the door frames that you put the door sleeve into.
And you really got made sure that those are encased in a box to make them plumb and level and so on. So you kind of build into the doors. And then, we did the concrete floor after we had, a few runs of the, the, bags in because we didn’t do a footer because the bags were concrete and about four layers down early videos, you see that we went concrete on those.
And then up about to the third bag level is concrete. So if we get any moisture or flooding or water or so on, they don’t care. So, but the vast majority of the building material is just dirt. It’s Adobe now out here when the reasons why we like this particular land is that the combination, the ratio of clay to sand and gravel when it’s just about perfect, 30, 40% and so on.
And it’s just like concrete now I can drive a nail through it. But I mean, you got to work at it. And, so we’re prepping this and by an hour or so we’ll be done with this. And then we’re going to do at least one layer, you know, of, hyper Adobe bags today. And then before we have to leave.
And while it’s nice, I mean, it’s nice today, it’s like 70 during the day. And, you know, is it gets low 50s or something, right? And, so we get up and we’re not in the summer blaze of, oh my God, which is when we did a lot of this. So we’re going to go ahead and get at it today.
And then, I have a bunch of show. We got all our work to do this week. And then another day this week we may try to go for two, layers. And I want to do at least three more layers. Then we’ll start taking measurements and so on, because we have an elevated bed that we want to have there where we’d like over there.
The windows may be different because we really like in the bus, you know, as we turn, we have a big window, we get to see everything. So we really like this window at the, headboard of the bed. So we’re kind of designing around that too. Over there is the utility room, the bathroom, the shower, the baths and bathtubs bathroom.
So we’ll do that over there. The toilet goes over there, washing machine will be over there. And how we’re going to integrate the roof into that is going to be creative. It’s not going to be a dome. It’s going to be the same kind of structure. Why I need my stamp press. And I need my welder and a plasma cutter.
We’re getting to the point to where we really had to work on the workshop and stuff there. I still need to do a concrete pad floor to work level on to get these steel frames the way I want. And, so it’s, it’s stages. It’s just so many different things to do. But we’re now at the point that we can start doing the final three bags, get them super level, be ready to go and then put that dome on top of it.
Then we’ll have like a 6 to 8 inch barn beam that we have to build forms around here to pour the concrete in. Now, fortunately, it’s not going to be so high that we can’t just use the cement mixer bucket. Now, on the bottom of that is a door that opens and it just pops right in. Now, the thing is that we can’t do big giant batches, but we can do batches enough that while it’s still, whack, you know, we can go ahead and start filling it up and smoothing it out as we go around it.
And because the dome kind of comes in, we have and we have a hose that goes in the bottom of that, we can direct it if we want. Then there’s, there’s a whole bunch of other techniques and things that we’re going to be doing, but this is at the stage that we are now. And that’s why we had to spend so much time on getting the workshop and a lot of the tools and equipment ready, and so on, because we’re at that point to where integrating that dome into the door frames and the windows and so on, I need those tools.
Today we worked on framing this side of the coop. On the right side there’s going to be a door. And on the left side we’re going to build a pony wall, anchor a shelf to it. And above that we’re going to make a hinged window and fill it in with chicken wire hardware cloth. So it’ll still be open and ventilated, but we’ll be able to open it or close it as needed.
And then I put together some of these roosting things for the chickens. They love sitting on things, so I’m not really sure where I’m going to put those yet, but, we’ll figure that out when the time comes.