



Homestead Maintenance Day: Slime, Shredder & Sphere Floor
Welcome to Occupy the Land. This week we turn the
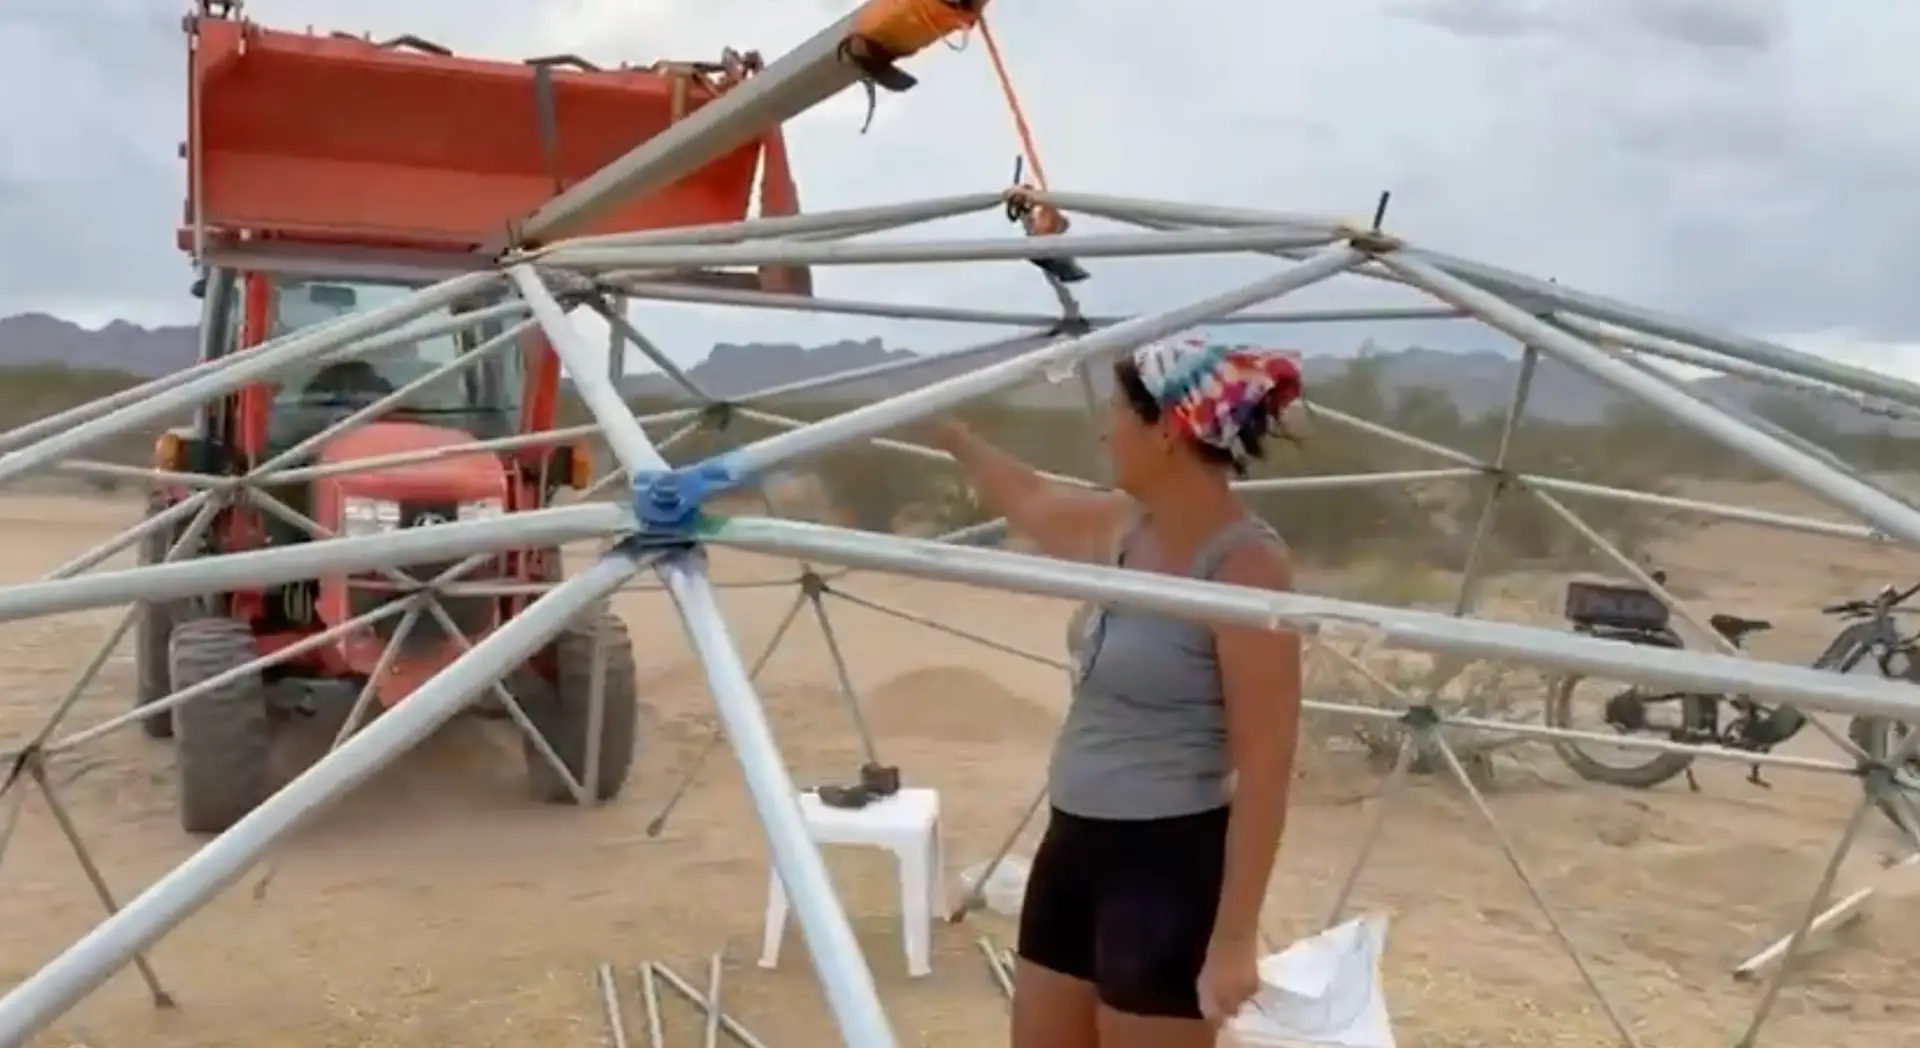
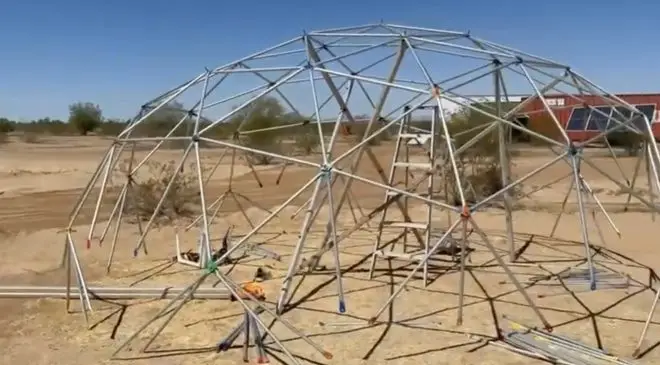
Welcome to Occupy the Land. Donna and I assemble the top half of the 20ft geodesic sphere in about an hour using color-coded struts, longer bolts (for hanging shelves and a future curved screed), and the tractor as a lift so we can work at a comfortable height. Next we set it on the buried bottom half and wrap the fence over the whole structure. Then the rain finally comes. We walk the property as washes fill, dikes hold, sheet flow slows, and water begins feeding the sand pond and orchard area. This is the first real test of the drainage plan: retain, saturate, settle silt, then store. Two stories in one episode — the sphere going together and the desert water system coming to life. Peace.
Transcript:
Okay. We’re put together by the numbers. Now, this is what’s going on here. Come hold this baby. Now we have about four feet more for it to go up. This is just initially took us, like, I don’t know how long you and I have been working on this. You know, about an hour. Okay. Now, where we are is the bottom of the yellow right here.
This is how much we got done. This is the center. And then it kind of goes around and we just repeat this. There’s five sides of this Pentagon here. So we did this part. Then we did the same thing here and here. Here. So this is the top center right here. Now these yellows these are orange. And it goes down another yellow.
And this is the only part where, you know, it’s like super flat, you know, for windows and stuff. But anyway so we got to here. That’s where the yellow is down right there.
So that’s a yellow. So that’s how far we’re down. It only took an hour. So you can see we can get this done pretty quick. Now one thing I wanted to show you is normally when we first did this, you only need about an inch of this to do it. And that’s what we ordered originally years ago. And it was such a pain in the butt to put these.
We had to, like, vise grip, the, the connections. We would take vise grips and, and hold this together and then feed it in there and catch it. And it was just annoying as hell. Then we went to inch and a half or inch and three quarter and that made it pretty easy. Now the reason we did these longer bolts, this three inches is because what we’re going to do is on the inside, when you do these, you can do these little screw on, eyes that go on here and it gives you something to hang on.
So we’re going to do hanging shelves and so on. So we did that here. Now up on the top part, the very top. And the next five connections there, those are sticking out like they are in the lower dome on the lower sphere. What we did is we had them all going out. And if you guys remember, that’s when we had concrete pads that had a hole in them that we poured so that the those bolts would sit in the hole on that pad and lift it up a little bit.
So we make sure we could get some, you know, good material underneath it and really embed it. So that was the reason for that. Now the reason we’re having these go up here is because on the top we’re going to have a jig that curves around it. And it’ll be plywood or PVC baseboard or something. I think we’re probably going to be doing PVC baseboard.
I got an idea of how to do that. So when we lay the air Creed and, you know, the stucco and the lava Creed and whatever materials were used at different parts of this, we can make it perfectly round. So it’ll be, you know, like a screed that will go on the top and it will curve around to the bottom and we’ll have like, I don’t know, skateboard wheels on the bottom or something, and it’ll go press up against the dome and the final coat will be able to just spin it around and around and around and around, and it’ll make it really nice.
That’s an experiment that we want to do. And I need that, you know, to be able to do it from the center. But the height of these bolts is about how thick we want to have a material on it. So we’re going to go at least four inches I think. And that’s why we want to do Air Crete Lava Crete for most of it because it’s not too heavy and that’ll support it anyway.
But you know, you know, don’t stress it more than you have to. So you can see we’ll have this done today. We’ve only been doing an hour. I go check on some software stuff that’s running and, but yeah, doing it by yourself, paying the. But that’s not going to happen. So Don and I have to do it together and makes it go pretty fast.
So we just, you know, at this junction we need I need two blues, a green and a red. I mean, you know, to get it, we put the hub together, do the next one, next one, next one, next one. And these have I think h dome. The whole sphere I think has 180 junctions. So we’re having to do out of 80, 90, you know of these.
And we already got a bunch of done. So you can see we have two more runs to do. We have a let me show you on here.
We’re going to do this one. So where my fingers we’re going to do this here to yellows and then all these connecting. And then another one down here. And this bottom one. We only have these coming down. This horizontal one is one that’s shared with the bottom dome. So we really only have to do from here and this junction.
And then all these that go down connect with the bottom part of the sphere. And we just connect those together and boom sphere is done I mean for you really really really really, really wanted to. And it really really wasn’t. Oh my God look at Donna hot. You know we could just get it done today. But I got a show this afternoon.
I got to finish processing the other one. And that’s computer stuff. So anyway, dealing with that, which is always an interruption. And then once we get this sphere done over there, then we can start overlapping the fence and start wire tying that down. And then we have a sphere. So see these are not that hard. But it really takes two people.
And you can see our, you know, strip piles getting smaller. So we’ll go ahead and finish this up and we’ll show you putting it over there and putting it on. When we do that. That’ll be interesting. He’s. And occupy the land. Occupy the land, dog. Well, today we’re putting the top of the dome for the root cellar together, and it’s going pretty fast.
But it is windy where we’re doing this video because it’s so windy out that it got. You couldn’t really hear us so early. And I have gotten this part done in about an hour, and we have two more rows on the bottom to do, and we’re expecting some rain, so we’re going to try to get this done if we can before that.
But we’ve constructed this lift here with the tractor because it’s much easier just to lift it up as you build each row. And so we’ve got that here. And then I’m just waiting on Ernie and we’ll lift it up another level, because we’re going to just do another row real quick. Okay. This is one thing I wanted to show you.
Go ahead and just hold that up. This is the this map. This is the center of the dome up here. And then, you know, it has five areas that go down like this one. And then the second one, the third, fourth, fifth. So it has this as a graph though there’s other maps that are, you know, just go from the top and have kind of easier, but you can figure it out from here.
Now what we have done if we constructed it down to here. So we got another, you know, about four feet to go down. Now, what we’re going to do is this bottom run right here is the top of the dome or the upside down dome, the bottom part of the sphere in the root cellar. So what we’re having to do is we’re going to take these vs and connect them there.
Now to connect the whole sphere together. So what we’ve done is we’ve gone from here to here. And then we have, you know, the rest of these down there to put them together. Now one of the things that we wanted to demonstrate is that we used to have these bowls going, get me one of the bolts over there.
These bolts are three inches long. You only really need about an inch and a half or something. We used to order them like an inch and a half, and it was such a pain in the butt. We would take vise grips and hold these here and put them in. But now that we got these long ones or longer ones, we’d have a little bit less than this and it would go pretty well.
But what we did is we needed these long and they stuck out, you know, especially up here at the top on the bottom part of the sphere because we put them in to concrete. Go get one of those concrete, things. You have them over there. They’re on the other side. Yeah. Go ahead and get one so we can show them that.
So what happened is we had these spacers that we made out of concrete and a straw, and we’ll show it to you so that it had a hole for those to go into so that we could position it and have space underneath the pack, around the, soil and the Cow Creek to make sure that it was embedded.
Well, so now these we have them facing in because you can put these screw these little I, junctions although I bolts that kind of screw onto here so that we can hang things and we’re going to be doing hanging shells and so on. So this is what we did. We had this owl that almost hit my foot.
They just leave it there. I need it down. So what we’re going to do. Well this one didn’t have the bottom taken out.
Yeah. There’s a straw that we had. There it goes. So we had these and we had them in the bottom. And with this dome with these sticking out they went in there and it made a space.
So it was like this. So it had a space where we could pack the mud around it and that really. So that worked out well. We made a bunch of those. We had some left over. So what we the reason that we had them sticking out on the bottom was for that. Now the reason we’re having just the top, the center and these is because that is how much lava Crete and concrete and air Crete and whatever Crete we want to put on there going to be experimenting with some different things and that is the thickness.
So between that and the bottom of these runs here, that is about four inches. So we’re going to have at least four inches. We may even do more. Now one of the benefits of having that bolt sticking up in the center is going to make a curved screed that goes all the way down to wheels that would be down here, and we put the material on it and then screw it around to keep it even and round and nice and not look.
So, you know, angular and these aren’t really that angular. It kind of goes out when you’re doing them. We have in the past. But if we can make it nice and smooth and go up to the windows and the skylight and, you know, it just be nice. So that’s what we’re going to do that. Now, the reason we got these here is because you drop down, you can hang shelves on them, you know.
So that’s what we’re going to do because I’ve done that in the past and it’s a lot easier putting shelves up when you hang them in tension. Because these in compaction the domes work really well. So we have this on the I have it propped up. So when the hydraulics start to go out, you know, it doesn’t just squish it, you know.
But so we went ahead and raised this up a little bit, and then we have it at chest high. So I’m going to go ahead and do that now because we’re going to be, you know, doing that more. So hold on I’ll start the tractor.
Controls. All right. So take this. Pull it back.
I think I got it up as far as it’s going to go up. There you go.
Okay. So now we can work on it at you know, head high, waist high and not be such a pain in the butt. And that’s one reason why I like doing it this way. Now on the big 30ft domes we have, usually we put a pull up and we run lines, you know, to hold it up. And then we have a pulley system at the top and we just crank it up as we build it.
So that’s like when we, you know, we do the, the big ones over there, that’s a 30ft. It’s going to be coming over here later. And so this is we’ve only worked on this. How long between both of us? About an hour. An hour and a half. No, an hour and a half. So once you do the stretch and yet we we can make domes really fast.
The sphere thing, and then the dirt and covering it with the wider, you know, that’s a pain in the butt. But if you’re making domes like, normally this, the chicken coop and the, garden area and all that, we just need to get in production. Most of these are going. The buildings out here will be replaced with domes because I like them, and they’re strong and they work well, and they’re in high winds and so on, and they’re just a lot less problem.
But putting them together pretty fast, punching these out pretty fast. But you need to have experience in doing it. Things about the length of the screws and that and not be a pain in the butt. You know how. Make sure you color code all of the struts so you can follow the map. It takes two people to put it together, but, you know, I could.
From ten foot empty conduit, I can cut it, size it, stamp, press it out, it flattens it, punches the hole in, rounds it out, you know, do everything. Color code it, put together in less than a day. And it goes pretty quick. Especially the smaller 16ft domes there. Just pump those out like candy. So we’re going to go ahead and try and see if we can beat the the storm that be a common, you know, and try and get most of this done because I’d like to in between shows tomorrow, maybe even get this over on there to have the sphere done.
I’d like to do that for this week’s video. So you can see now this is going to go for this big. So that’s what we’re doing, how we’re doing it, why we’re doing it. And anything you wanted to add Donna. You know, your experience in doing this definitely is goes faster with two people. You I know that you put it together by yourself before, but much, much easier.
Much quicker with two. Yeah. Don’t like it. Don’t like it. Well, it’s fairly easy if you use vise grips, you know, you just kind of get them in place and hold them. No, it’s a pain in the butt. Two people can do this really fast. Well it might be easier for you. But for me like to try to muscle these.
Sometimes you have to muscle them together. You know, the the struts together? Yeah. The whole pull the muscle, my tricep or something. My left arm to the go. Pulling on. Kind of. I didn’t like it, you know, I go whoa whoa whoa whoa whoa whoa. I don’t have the strength to do that, right? Yeah I know. Because it’ll do you.
I already have issues. So that’s what we’re doing now. What we’ll take when we get this done as well. I might put a heavier strap up there, but, we’ll go ahead and take this. Just lift it and walk it over there and set it down and start connecting the bolts, you know, with the common run at the bottom that they share to make it one sphere.
So this is what we’re doing. Just wanted to kind of give you a how it’s done. And it goes pretty quick. And this is the stage you’re at pace. Oh, and if we get some video of some nice rain, you know, we’ll show you that too, because yeah, it’s about freaking time. It’s raining all around us, you know, on the, you know, our friend Bob that lives, you know, like 20 miles over that way.
He said he got, like, good 20 minutes up and I could see on the radar that’s going to go to the east and the west of us and kind of, come on, come on. I mean, damn. So we got to do to get some rain. Oh, we got to do dance. Gotta do a rain dance. Some rain to ask me little rain in the.
So what we’re going to go ahead and do is show you that this week as well. And we, we kind of prevented the where it can go. We put some dirt up around. So it’s probably not going to flood in there. And if I have to and it starts getting, I can just take the tractor and dump here and dump there and dump and I’ll have some fun.
Yeah, a little bit of water is not that bad. We’ve been using probably a 1500, 2000 gallons of water that we’ve had to put in there to wet it and keep. So if I can get some rain to do it down the bottom before we start putting the fine, I’m good with that. So we’ll be all right. All right.
Talk to you later, piece.
Well, we’re getting rain. We had to hurry up and put everything away. We’ll give you the aftermath later. But it’s lightning. Thunder? What’s right?
All right, here’s the dike that protects the east side. I mean, the west side of the sand pond. That’s why we built this up. Now what happens? All the water that comes and sheets across here, which you’re starting to see here, soaks in to this area and eventually runs along the back side of the property here along this road.
And then it comes in over here, but it fills this up first.
So this is going to get green. Green. This is the one going to be the green green green places. Now the get down here. This wash here is one of the primary ones that will fill up the sand pond over here. And there’s that dike that protects the orchard. Now this is going in minutes. It’ll start flowing over and going into the sand pond.
It already starting to feed in there. Now what? I’m probably going to be doing this area right here will keep this low and kind of make a little lake here before it goes in to the sand pond. That way a lot of the silt and so on will settle out here, and then it’ll overflow over here. And I can make a kind of a filter with sandbags.
I mean, those hyper Adobe bags, you know, and this will be full probably by the end of this rain. This will be up quite a bit once it starts overflowing. Everything move that gets done really fast. It’s already starting to cut. That’s why we need the pond liner. So it’s going to do all this crap now. This is what I was talking about on the other side of that dike.
It hits to the back of the north road here of the property, and then it starts flowing in. So that’s what’s happening here.
All part of the plan. Part of the plan. So this is the north side or the short ends of the property and everything that comes across the property that makes it down here, the roads. Right. Tilt it that way and it comes along here, then eventually goes into there. Now this is what I was showing you. The dike here that’s holding back the water on all this part of the property.
Now, if I wanted to, I could build this up here and just make it a lake. You know, I don’t know how much I want to, let go or hold back or. That’s enough for now. And then we’ll go ahead and do that. But this is why I needed a rain, you know, so I can see what’s up.
So now we’re going to go check the north western part of the property where all this starts coming across the land, and you can start to see how the washes fill up. And it starts to come down this way. But our whole point is Sunni bulls up on the other side of the property up there, which is kind of a round indentation where you plant indigenous trees and you never have to water them or mess with them because they get plenty of water.
So that’s what we’re going to do there. So this area is kind of left alone and it’s just going to green up. You know, I’m not sure what I’ll be doing over here. We might have whatever heck we want. That’s what we’ll do. Yep. We’re going to go take a look some more.
Okay. Now this is the property next to ours. This is the corner, the northwest corner of the property. And you see the sand pond is down at the end of that road there. This is where this property from the mountains it comes across. And it gets over there in about 3 or 4 different washes that I tapped into that go, whatever it doesn’t make into the washes.
It comes down here and you can see, you know, it’s just kind of angled off to where it goes that way. So all this water makes it down there to go fill that pond. You know, it’s just got started telling you it could be within an hour. I mean, it’s one of those man. You can see it’s like deep.
Now we’re going to go over there at the source of the starts going into the washes, and we’ll go check that out okay. Now you can see all the washes that, you know, just sheet and flow off of, you know, our land that just keep coming across. Now this is the dike that we’ve been building up to protect that so it doesn’t get on.
My God, most of the water goes down to the end of the property down here and then over. And then this locks all of this so you can see this is what’s coming in now. We’ll get it may build up, you know, because even though it’s kind of lightly raining here now, kind of toned down a little bit, all that’s coming, whatever falls over there is coming.
So this is a walk over here. So it’s taking the bike because it’s kind of slippery. But the, there’s several of these washes that continue from the west side of the property that fill up and go this way.
That’s why you see all of these washes that I’ve back drug with the tractor to kind of make them an even flow so they don’t make big ruts. See, that’s what’s going on here. So I don’t have to do a lot of maintenance on them if I just let them rut, you know, in some places they will just drag them once.
Boom, it’s done. So it doesn’t take much maintenance, but you know, it’ll be over the next few days. The rain stops. I’ll go around with the tractor and have some fun. So this is the west side, the long side of the property. And then on the other side, the east side, you know, over on the other side of the bus there is the east side of the property and this is the west side.
Oh, it’s starting to lighten up. Okay.
Yeah. But man, there’s some rain coming up the mountains. We’re going to go up there a little bit. I got a couple of main, washes that I want to check out, and then we’ll go check out the the check dam that’s over by that tree. All right. The wash coming on the property. Now, this is moving faster.
So it’s not going to be as clean. And this is one of the washes that we’re controlling. That is a lot of water. It stopped raining but it’s still going. It’s going to be coming for probably another hour at least. So this is all this goes to where I need it on the land and eventually to the storage man.
And then and then so and there’s a few more up here. We’ll go check those out. Okay. No little wash. One thing I wanted to show you is as you slow it down.
And it’s clean.
This is clear water. This is what we’ll be drinking. This. So.
Yummy. So that’s why our all water is going to eventually come from. Is this because we can’t.
Okay. This is one of the first washes that we had. This was the one that goes by the bus behind the swimming pool. So you can see there’s probably 4 or 5, six of these that I have and that this is just half of the property. You know, we have at least another third that’s on the other side of the airstrip here.
I call it the airstrip because I, you know, wanted to have 1000ft that I could do ultralight and explore all this stuff because it’s so much, even on the mountain electric bike and pink for freaking ever. I want to go find where I want to go. Now, this is 60ft back from where our property line is. Our property line is where that post is there.
And this is yet they do like 60ft easement from the whatever. So I went ahead and measured that out. Now see all this water that comes off the mountains here that hits this road goes along the right side and it gets over to the property line, then goes left down that west road that goes down to the sand part.
Now, what this clearing is here is where the fence line is going to go. This is where the actual gates and so on are going to be. You know, that’s why you see some, railroad ties over there and so on. As for the building of the fence here, they’re going to get going next month. So and this is the runway and it’s a big parking lot driveway.
Have party, do whatever. But you know, that’s what the primary reason for this was. It had to go between two washes. There’s one on that on that side and one over there. And this is the only place that we could have the longest run. So that’s why we did that. Now in the drone video, you see a lot of these holes.
Now, what these holes are for is when this floods, you know, and you know, this will flood. It has when this floods that penetrates down into now I should have, you know, kind of a go around sometimes to do that so that it’ll penetrate it. My whole goal is to saturate this land instead of it just sheeting and running off into the washes, because that’s what happens.
It’s sheets. Those are the washes. It goes off the land. If I can retain it and then charge the soil and it moves when it. If I can keep this flooded like this for even, you know, a few days a week is because the water travels through the clay at about a foot every 24 hours. So that’s why I put them like ten feet apart.
So I go, you know, ten days a week, week and a half. We got a monsoon for a couple of weeks. Boom. The soil is saturated. It’ll be that way for a long time. So I go down like a foot or two. Six months later, after it’s rain and the soil is voiced. Which is why I did the ditches, you know, for doing the orchard and so on.
So there was a plan to this from the beginning. And the, the difference in elevation, you see way down there, this is the top of the property is that. Oh, right there is the southwest corner. And you go all the way down this road here, and it goes all the way to one side of the property. And then we’ll go look at the other side.
Down at the corner with the sand pond is way down yonder that is only ten feet below this. So it’s a grand flow. So it doesn’t like, you know, oh my God, rip roaring through and mess up everything. Especially when I flatten out the washes that way. So it slows it down. Winds it out. Posits the soil there.
Water doesn’t get to buddy had too much crap goes down and we can store it, but we can also have it to where we want. Now there’s a couple of washes on this side of the airstrip. Over here is about a third of our property that we’re not developing, not doing anything. You know, family, kids, my sisters, whatever pays, do what you want.
So we’re not messing too much with the washes and stuff over here. Just see, you know how that works. And we’ll go take a look at how we control the water for that. But this is what we’re working on because it’s just Don and I. I mean, you know, I got enough to do, you know, another half. So that’s what we’re doing.
Let’s go take a look at some of the other stuff over here and over here. We’re still on the undeveloped area. One thing I did do is I piled up a little bit of soil here that’s broken through so that it would water this tree, because I like this tree. So we’re going to we haven’t trended or anything.
I just wanted to make sure it got, you know, more water and it got more water. So that’s what we’re doing. Yeah. Detected moisture in the.
The microphone port and so on. So hopefully we’ll have too much wind you know. But you guys can see what’s up. Now this is what it’s like naturally.
Water in this tree and we haven’t missed it I really like this tree. This is going to be, you know, a special something. Something for somebody. Something you know, as time goes on. But you can see we backed it up here. So you got. And this is kind of like a check dam. I’ll show you what the check dams are.
But more sheeting and you see cheating, cheating, cheating, cheating, cheating. And that’s why we have, the berms and so on. I want to keep this here and maybe even make it deeper so this soaks in. This is why I keep talking about, you know, this is going to be from space. It’ll look like a green postage stamp out in the middle of the desert.
It’s because we’re retaining the water. I already know what happens. I’ve been living in the desert for a long time out motorcycle riding and exploring and such. And you know how it what it does to the desert. If you can back it up any amount of time. Because when we were kids and we’d go camping wherever there was any kind of washes, we would make little dams because we knew we would be coming back.
So we had all these dams, and when we come back, you could see what it does. Like beavers. There used to be a lot of beavers in Arizona until there weren’t, you know, and that made a big impact and about 20 minutes later be showing you around the property that’s like quadrupled in volume. You know, it’s just going to keep going and going.
That is when it gets up around, you know, about here. You know, I think that’s I think we figured it out. That’s like 90,000 gallons. You know, as a, you know, builds up to this area. Now we’re going to have a pond liner that goes from like there over to there. And it’ll come in about here about where I’m at now.
And that will be where we put the, it’s about 2500 gallon. I think it’s like 34000 gallon. I can’t remember, I got so many picked for them. But, we have one. It’s at a friend’s now. We’ll bring it over and put the pond liner down and it’ll go there. Now, the top of it will be about even with this.
So we’ll fill it back. Fill it with gravel and sand. You saw how we set, how much we got in our, you know, land. I mean, it’s a lot. I mean, you can separate it out and we’ll put it there and that’s where we’ll pull the water. Then the water will go up. We’re not sure exactly where we’re going to put it.
Probably be over there in the high spot over there. That 6500 gallon water tank, it’s vertical and it sits on a steel, cage that has access to, you know, a concave bottom with a valve in it so we can flush out the silt. So whatever silt does make it in to this tank, it goes over there and we can, you know, just like back flush it, you know, have it go out and then we’ll pull from, you know, upper part like three feet up on the tank.
So this is the plan. And I couldn’t demonstrate it to you until a freaking rained, you know. And then one little rain and it just kind of did everything in it. Hey.
Bitchute link: https://www.bitchute.com/video/ORQQrcoItoa7
Assembling the Top of the Sphere + First Real Rain Testhttps://t.co/6ari8Koq3z
— occupytheland (@occupy_the_land) September 26, 2026
Welcome to Occupy the Land. This week we turn the
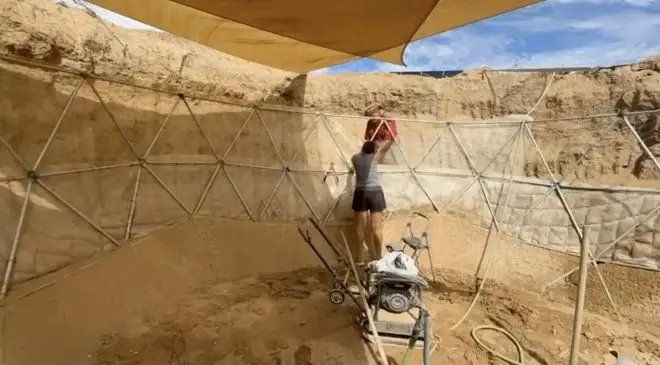
Welcome to Occupy the Land. This week we keep chipping
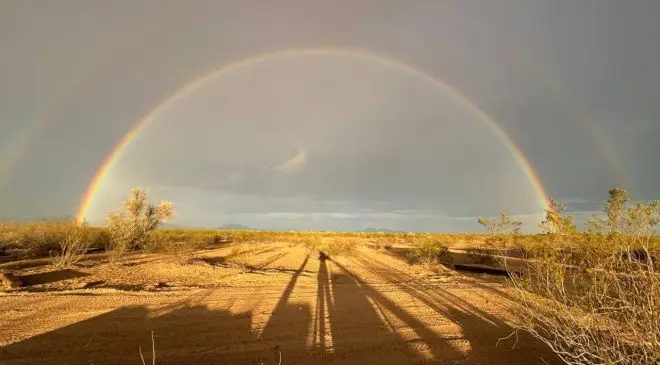
Welcome to Occupy the Land. This week we’re focused on