



Undeveloped Side vs Managed Side — Same Rain, Different Result
Welcome to Occupy the Land. After the rain we walk
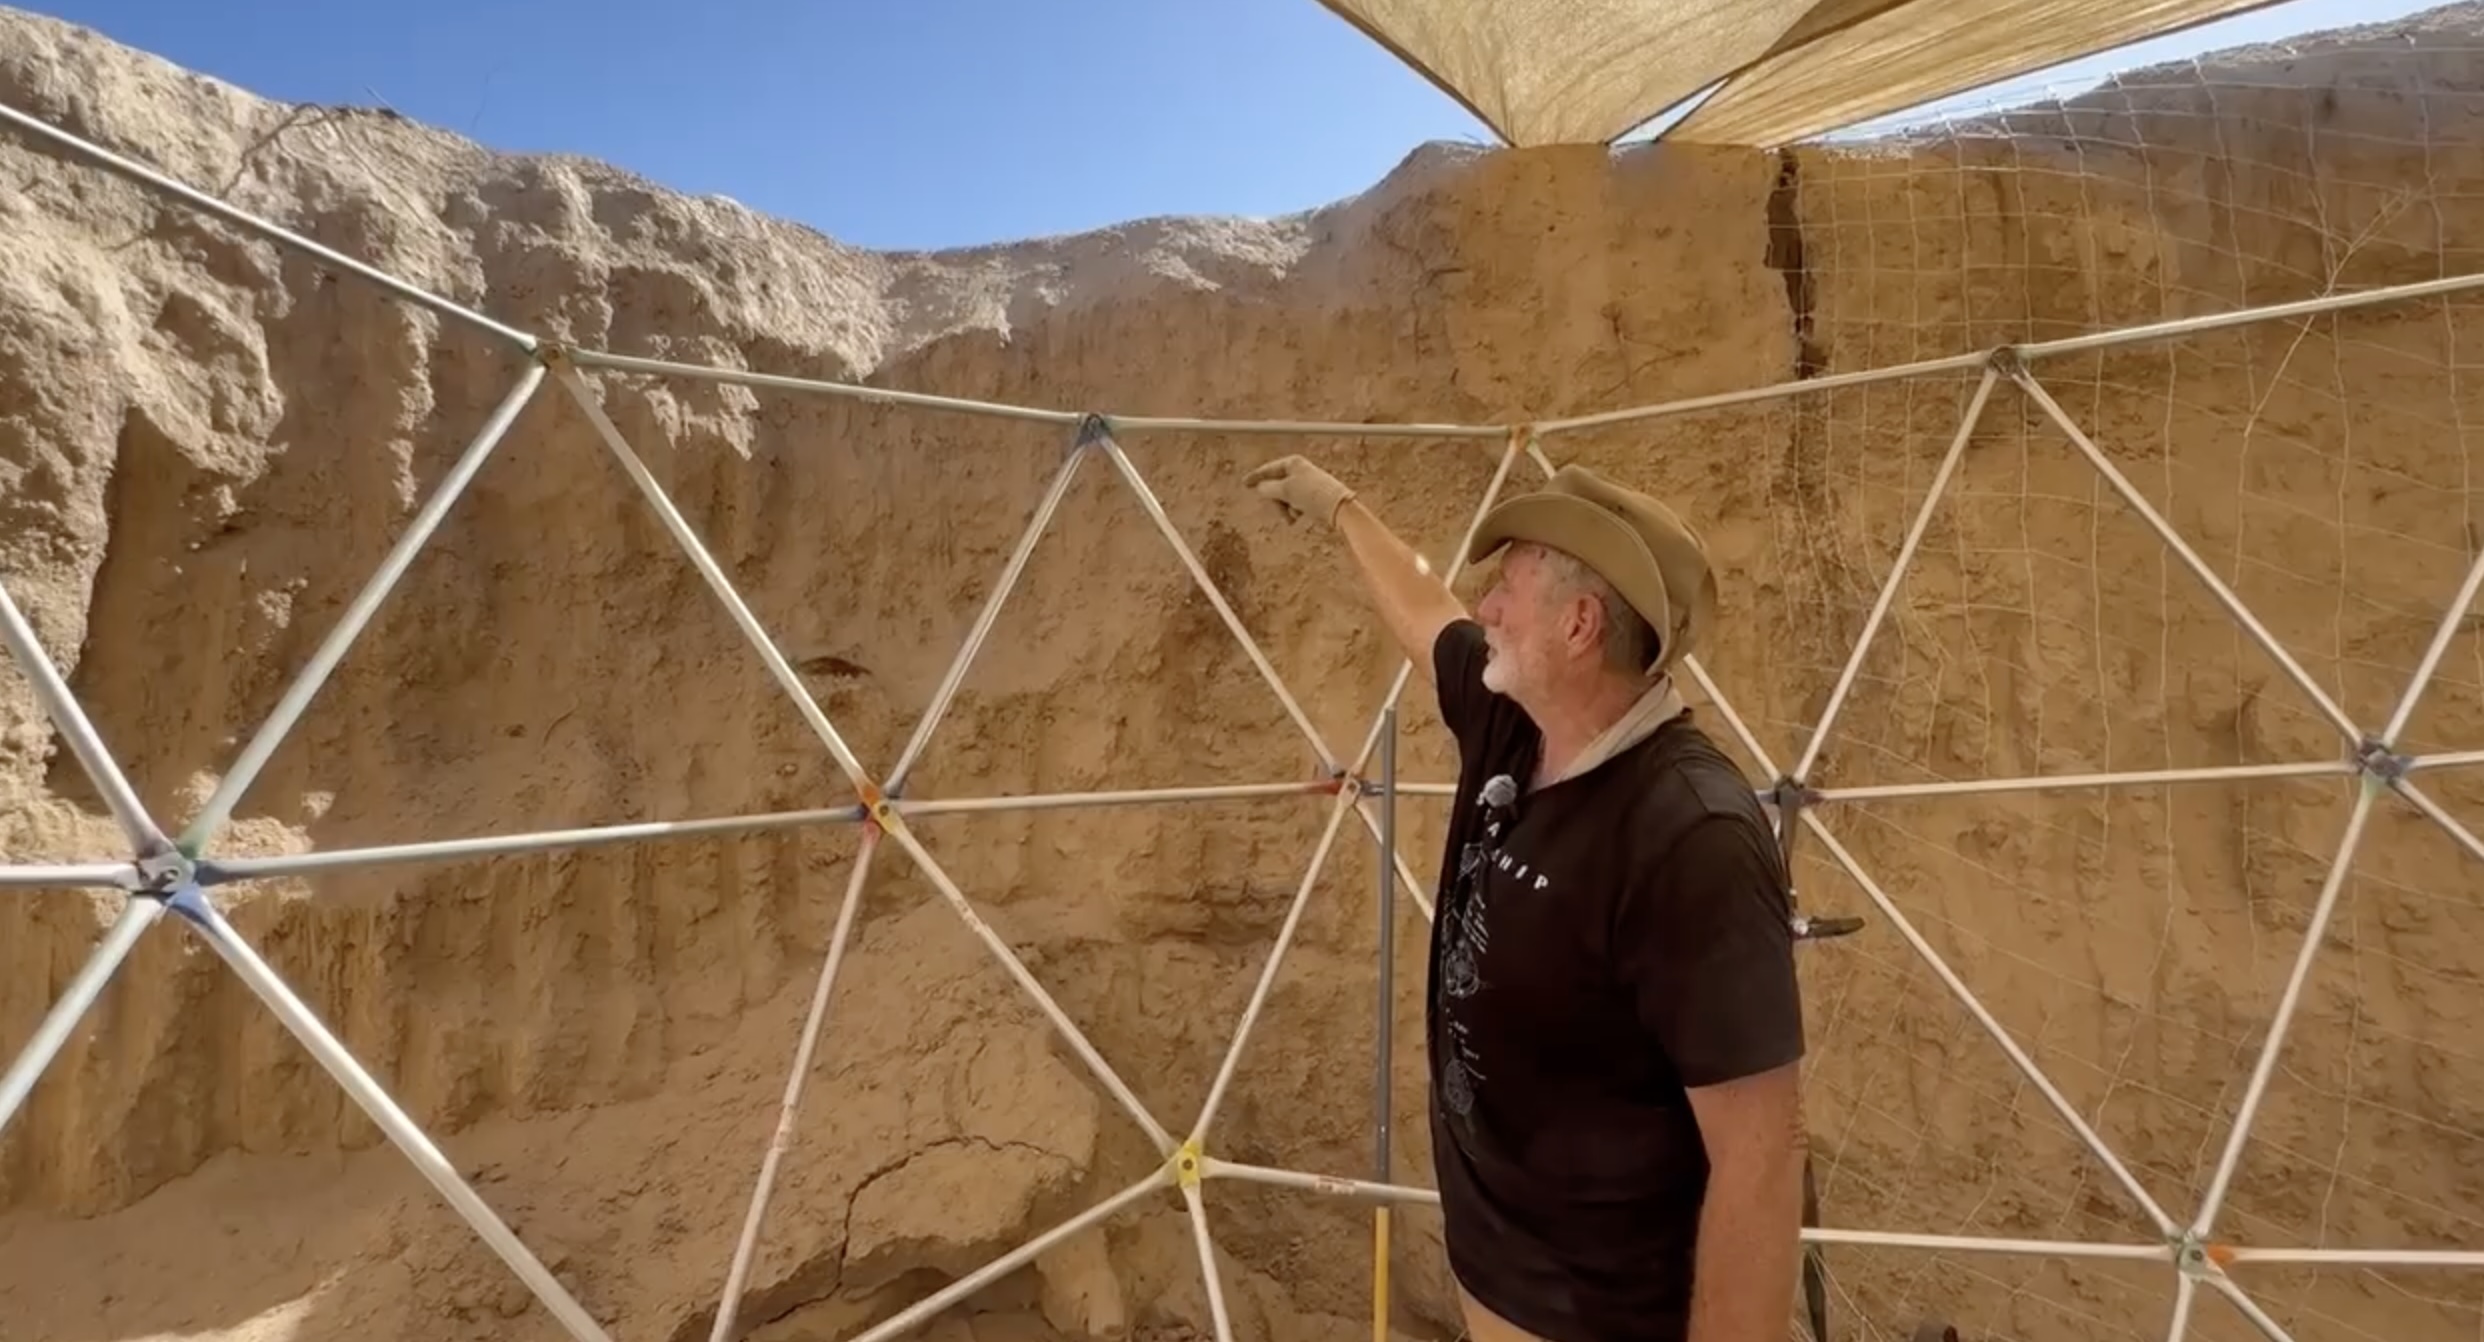
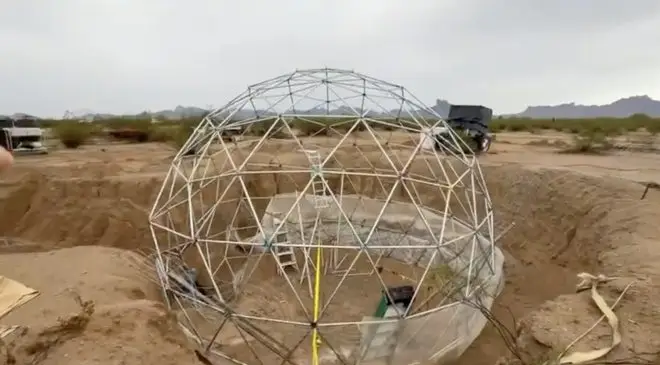
In this episode of Occupy the Land, we advance the 20ft geodesic sphere root cellar by compacting and leveling the bottom floor, planning the concrete pour, refrigerator/shelving placement, and doorway framing while backfilling soil around the structure. We also prep the sand pond area with a 100×100 ft pond liner section, build dikes for water retention, plan a perforated collection tank with biochar filtering, and discuss pressure systems for the orchard. Additional updates include chicken water gravity feed, potato bed acidification, bus awning work, and grandsons visiting to help with plasma cutting. Steady progress on food storage and monsoon water management in the Arizona desert heat! Peace.
Transcript:
All right. Welcome to occupy the land. Occupy the land. Now, what I’m going to be showing you. We’re at the next level. We’re doing the floor at the bottom of the root cellar because we had to do the geodesic dome struts. Then we put the cow fence on here and you can see. I’ll wrap it around it. We have it stretched, you know, in here, and that you get dirt on top of it.
You can’t pull it up. I mean, it’s amazing. Now what’s going to happen is we’re going to put the dirt up against here and well, we don’t have any exposed area kind of show around here. You know, the we put the soil in here, have it wet water and it comes in and then it packs behind it and you just carve it and you just go ahead and just smooth it out.
Then we’re going to put stucco on it and fiber reinforced basalt fiber stucco that goes over it. And then we put a fiberglass mesh on it. So when we put that mesh on it then we do another layer of stucco, which may be up to an inch thick. That’ll be the wall. And it’ll just be nice and smooth and will smooth this out.
But first we got to do the floor. Now this right here. That stake is the center of the dome. Now it goes down about a foot. I mean, about 2.5ft down to the bottom of the sphere. Now, this is the plan we wanted to know, well, how high are we going to go? And it looks about like this.
There are some struts like this one right here is flat, and there’s five of them that go around. So we could use this as the level, but this is going to pack down quite a bit when we do the compactor. And then we’ll go ahead and put layer of concrete on it and then start to form it up into the wall.
So it’ll be nice. You know I like it. And I got to start after I do this thinking about, you know, maybe I want to drain or sump pump area or something. You know, something. We’ll see. But we’re Donna standing now going to turn around. So this is probably where the refrigerator is going to go. It’ll be here about this high.
Now if you look, you know, even with this floor up, the halfway mark of the sphere is up there. So let’s client. It’s high. So that’s where the ceiling is going to be. So we got plenty of headroom. Now you can see as we bring up the floor you know you can reach. So we put shelves in here.
It’ll be we’ve done shelves before and you put them out and you have struts that go into these hub points here. And that’s what can support it. Now we can do counter levered and have it back here. We can do we can do all kinds of stuff. But the first thing is is building the bowl. And then when we get high enough and I’m happy with how that’s going, then we have another dome.
We already have the struts done that will build in this configuration like a dome. And then we just set it on top. We’ll take the back ho and we just lower it down, undo these bolts, hit the top and it’ll be a V that comes down from the top. And it’s just add to tighten it back up loosen it, add the two, tighten it back up and it just.
And then all of a sudden the roofs on. Now to do the floor. There’s a lot of different things that I want to do. But first we want to go ahead and backfill all of this soil that goes down here. And it’ll create a floor up and we’ll keep compacting this as we bring it up. So it’s going to take a while.
This has been a thing in 110 degree weather, which is yeah, it’s only 110. You know, a couple of years ago it was like 100 days over 110, wasn’t it? You know, it was just it was ridiculous. So you just got to get used to it. And you wear gloves not for abrasion or too cold or anything. It’s because everything in the sun is radioactive.
So what we’re going to do is just do a time lapse real quick of me go ahead and compact in this because you need to compact the soil. Certainly, you know, as you build it up. So we’re keeping doing that. Then we’ll put some we’ll wet it. We’ll put some fiberglass down on it that we tried on the test pad by the workshop that we did because we had like 3 or 4 different mixes and put concrete on top.
We added some later just as an experiment, because that was kind of a temporary pad. So I got a beat on what I know works and what I want to do. So that’s what we’re going to be doing. So I’m going to go ahead and compact this. And then this is the door. Now you can have the door come straight up like this you know, and frame it in.
Or you have the bottom out. And it looks like I’m probably going to put the bottom out here and then have this, you know, just a straight pad that goes right into the floor. And then we take these out and you frame it and you know, with wood two by sixes or something like that, and you’ll have a door.
And then we got to decide how wide we want to do it, because when we do these struts that go here, I can make them whatever size, I can cut this, do this, I can make it whatever size that I want. So we’re going to go ahead and do that. This will be where the door goes. Then we’ll bring in the refrigerator.
But make a place for a freezer because we’re going to need to do some storing and then shelving. That’s really all it is. Now we have the solar rack and the unit that’s powering the garden area and the chicken coop. And now probably go here as well. Now I’m probably going to be upgrading that. We have some other solar panels that we haven’t used yet and I’m going to go ahead.
You know these are just free solar panels that, you know, kind of sort of almost work. And but I need some more power. We won’t have power. We want to have power, power, power, power. So I’m going to do this. And then when it cools down this afternoon, I want to finish putting the awning on the bus. Now I got some cobalt bits.
It was $80 for like a bunch of them. And it was, you know, free. But they’re not. Hell, you can spend that much on a single bit, you know. But this is a set. And I tested it and it drills through the stainless steel of the bus. That stainless steel is like a thing. I’ve been having a lot of respect for stainless steel.
I’m like, Holy crap, it’s so hard. So we’re going to now I got those bits and go ahead and mount the awning. We have grandchildren coming in two days, so we want to make sure we got, you know, shade for them and everything. They not die out here and become raisins or beef jerky. So. And they’ll want to explore and go around.
Peace, man. Just make sure you take a lot of water so maybe I can get them even, you know, help do a couple of things. Just say they did, but they’re just coming out to visit. So we’re going to go ahead and get this floor done. And then we’ll go through the process of layer taking it. And then eventually we’re going to be putting concrete on it that’ll blend into the walls.
That’s backed by the soil. Because this has got over a thousand gallons of water in here just to, you know, suck it up and soak it up. And so it reconstituted into that stuff. It’s heavy calcium and it turns into like rock. I mean, it is rock. And you can see the lighter color up on that ramp. I can’t I have to take the backhoe, pound the crap out of it and rip it just to even break it up a little bit because this stuff is is hard.
And I mean, it is concrete. You know, when that reconstitute, it turns into this rock because this is this it’s just dried out. So everybody’s going, well, you know, is that strong? Yeah. It’s strong enough. I get him freaking to it. So we’re trying to get this done before it dries out and it turns into rock again. So that’s what’s happening today.
Okay. We compact it. You keep doing this in layers, and I’m just going to even it out. And when I get done doing this, we’re going to wet it again and kind of let it solidify. And then we’ll compact it again. And we just keep doing that. And but after I get this done, wet a little bit and then before the next time that we’ll do it, we put down the fiberglass and don’t really need to.
It’s just we have, you know, some damaged stuff that we had and it might as well make use of it. And it worked well on the pad that we did the experimental one. So what we have to do is this. And then the fun part starts. The fun part is going to be bringing in the dirt, having it come in and kind of carving it.
And I did this on the lower areas and you get it wet and you just kind of carve it and it just really nice. It looks great and I’m looking forward to that. Now we’re going to have to compact it. We have campers and so on. As we put the soil in around it, kind of level it off and it’ll go layer layer layer layer and then we’ll embed it.
So one of the struggles is going to be making this level I got a lower area over here. I may need to pull that up with a backhoe a bit. But once this stuff gets embedded it doesn’t move. I mean, this is going to be way stronger than I thought it was going to be, but that’s what we planned and it’s just going to take time and pressure.
We need some more ditches to do for the orchard over there, so I may take the time later today when it cools off to do that. And then working on the awning and you do everything in stages, why don’t you do one thing at a time? Because it takes time. Sometimes it’s got to sit, sometimes it’s got to harden.
Sometimes I got the rain coming. Sometimes, sometimes sometimes. So, we’re on the sand pond. There’s a lot of different options that are coming up, and the pond liners are expensive. I mean, for me to do it the way I originally had be like $6,000 in pond liner, but we got other ideas that we can do in different portions of it and stuff.
But we’re taking you along on the ride. You know, we’re not we’re not doing this in the dark. It’s in the bright Arizona sun you get to see. Thanks for tuning in. Peace.
Yep. When you get to parts, they they get you. I needed like five of these bolts. I really needed two. We get five for backup there for holding the rim part of the back tires on. It’s been a thing. So it takes two weeks to get these. And five bolts, five washers and five nuts, or almost $80. I’m like, seriously?
Now what I needed is we’re putting up the awning and what stopped me is stainless steel. Oh my God, to drill through this stuff. It takes cobalt drill set. Now this is, you know, hopefully I won’t need to get any more like ever. But. And it wasn’t free, you know, it’s like 80 bucks or something to get these.
Now you get, you know, cheapie drill bits, harbor freight or whatever. Mostly for doing the wood and stuff like that, but for my drill press and for doing any metal, they, they work, but they’re not made for that. You need cobalt drill set. So that’s what I did. They have cobalt or titanium coated or that, you know, you need to get, you know, some good drill bits that I’m all, you know, things like tie down straps, drill bits, quality.
You know, there’s some discounted power systems and batteries and so on. Some of them work better than others, but some things you can’t skimp on. I mean, you know, like, you know, I want to make sure I got Jack stands out to hold up my cars or something. I mean, you know, some safety stuff like that. A lot of things I’ll get.
I’ll go all harbor freight on everything but stuff like this. You gotta get the quality.
Okay, now what we’re doing. This is the upper part of the sand dam over there is going to be where the water storage is now. This is where we’re going to be putting fruit trees, but we’re prepping the soil. And one of the things that we’re doing is you can see make a pretty good ditch and all of the branches and so on that we have all over the property from clearing it is we’re going to put in there, light it.
Then you just push the dirt over it and makes biochar. Now this one I’ve already got done that one. Now this is where we had already done it. And episodes ago you may have seen where we had the fire and we just put it in, and then you just cover it. Now, this is all a bunch of bunny poop, you know?
So this is going to break down into the soil and hopefully make it nice. Now we put a bunch of bunny poop over here where the potato garden is going to go. All that dark area from those plants over there to over there, that’s going to be a potato patch. Now, what we’ve been doing is we need to add a lot of sulfur and other stuff to bring the down, because seven is neutral.
Then you go alkaline base, whatever the acid, you know, on the lower I think it is. And you need to get it down to where it’s like 4.5 or something. Yeah. So yeah, you get down quite a bit. Now we’ve got it to where it’s about neutral. Is it. What is it now in the garden. I haven’t done so much here.
But in the garden beds it was one was like three and a half and the other one was still seven. And that basically was the addition of more peat moss. Because peat moss you can buy and it’s already acidic. So. So what we need to do is get it down so that we don’t have the diseases that affect potatoes, a lot of the blight and things that happens because the is too hot.
So we’re taking our time. You know hopefully the monsoon will come. And when it does that fills up. This whole area over here is just, you know, gets saturated. So we’re kind of waiting on that. So we’ll have that done. Then we need to get this prepped for trees. So we want to do fruit trees citrus trees and fig do well apricots pomegranate.
You know they’re good in the desert. We had those before. So we’re going to go ahead and start doing these. I like having a lot of citrus trees. Papa juice you know grandkids call it. So we’re going to go ahead and do that. Now some of the areas up to the road there we may have for some gardening stuff here, I’m not really sure.
But at least four of these ditches, because we want to prep that with the carbon because we need somewhere to put the creosote anyway. So it’s good for that. So we’re going to do that because all around the property where we cleared stuff, we have piles of creosote we need to take care of. And a lot of it is just dead stuff that we trim and everything and some of the trees and so on.
So that’s where that’s going to go. So Donna’s going to do me just, you know, and because the wind is blowing that way I’m going to be going that way with the tractor made that mistake before. So we’ll go ahead and I’ll dig the ditch here.
What we’re going to do is the distance between these are a little over ten feet. They’re about 13ft from center to the center on these trenches. The reason is, is that we wanted to have at least, you know, ten feet between them and so on, because as the trees mature, they’ll start to grow together. I don’t really mind that you can make a nice, you know, tunnel in them.
You know, as time goes on, but you want them far enough away that they’re not interfering with each other’s growth, but close enough that they can kind of share the same kind of water system. So that’s what we’re going to do here. So we’re going to go measure out 13ft I think is where we have it. And I’m just going to do it.
And I might be able to do another one here, you know, maybe another day or if I got nothing else to do. And I was sitting there and in my cab. And so this dike up here is almost three feet high. It’s a lot higher than what it looks like in two dimension. But up here where the all the water comes in and a lot of these different areas will flood first do this have standing water and then we’ll have overflows.
And the overflows will go on each side of this dike here and start to go down there. Now one reason we had the tape measure is that we’re ready to start putting the pond liner in, and it you can get it like 300ft by 300ft, and I don’t need that much. So I think about 100 by 100 is what I’m going to do.
And it’ll go to the corner over there. Go ahead and go over there to the corner of the where the bend is the road. And then it’ll come out 100 by 100. And then as I each season in the water recedes, we can just fold back the pond liner and just extend the deep part. We just eat at it more and more and more.
Capacity over here now is about depends on how we put it up. But just the bowl area, it’s probably about 80 90,000 gallons. So we want to catch that this year because drought I mean you know it’s yeah we had a story on freedom’s Phoenix to where they have machines that they’ve been taking out the clouds. You want to make it go hotter, use electromagnetic to remove all the clouds.
So I got to follow up on that if that’s true. I mean damn, but so hopefully we’ll have the El Nino and the monsoon overwhelm all that crap and we’ll get a lot of water because all we need is one good rain. So that’s what we’re doing.
rich. Digging is much easier with a tractor. It’s going to go along the whole length of this row here. It’s like you’ve done with this ditch and dig a trench.
100ft from where Donna is now is here. Corner is at sifter, over there. The aluminum thing. And then where those branches are? Over there on the right. The branches on. Yeah. There you go. Now, in between this is the depression where the tank is going to go. Now, you probably can’t tell how much how deep this goes until you have like a tractor disappear as it’s going through.
So this is where the pond liner will go on this 100ft square area. Then we’re going to put it up to the edge of the walls here, and then cover it with dirt to make the road that goes around here. So we can do maintenance, but all the water will flow down to here into a big tank. That is probably, I think it’s a 2500, 3000 gallons and it’s going to be perforated, wrapped in cloth, you know, a ground cloth stuff with hardware, cloth, metal wire, quarter inch around it.
And then we’re going to have it sit on the pond liner and then some activated charcoal biochar around it for some of the filtering and getting toxins out, whatever. Just cause and then it’s going to be backfilled with sand that’s from all this soil. And I keep talking about that. We’re getting closer and closer to start doing it.
And I have some grandsons coming this weekend that were going to let him play with the plasma cutter and doing fashioning some of the metal for doing that. So we may show that for next week. But with that tank sitting here and as all this water comes in, it will penetrate the tank and then we’ll pull the water out of the top of it so we won’t get so much sediment.
Then we have a 6500 gallon tank that has a rounded bottom on it that it will settle. So we’ll have the discharge of the tank will be up a little bit, but that rounded part will collect all the sediment and so on. Was open that and like back flush it and get it out. That’s the plan. Then we’ll pressurize the water with a pressure tanks and so on and filter it and all that kind of stuff.
So that’s what we’re doing now. Fortunately, because it hasn’t monsoons yet, we have a few weeks. I think that I may need it to rain at least once to kind of compact this, get the clay right and so on. And then that’ll help me engineer it better for when we put the tank on. But we’re going to go ahead and order.
So I need to measure it. It’s 100 by 100. It’s perfect for what we’re doing now. Now I can just take when it’s next season it cools off. I’ll take and peel that back to down here. You know, just bring the liner back in and then extend this bowl. Just keep going and going and going.
Desert Monsoon Prep: 100×100 Pond Liner, Dikes & Sphere Updateshttps://t.co/lrkPQ9Djve
— occupytheland (@occupy_the_land) July 10, 2026
Welcome to Occupy the Land. After the rain we walk
Welcome to Occupy the Land. We finish the top half
Welcome to Occupy the Land. Donna and I assemble the