


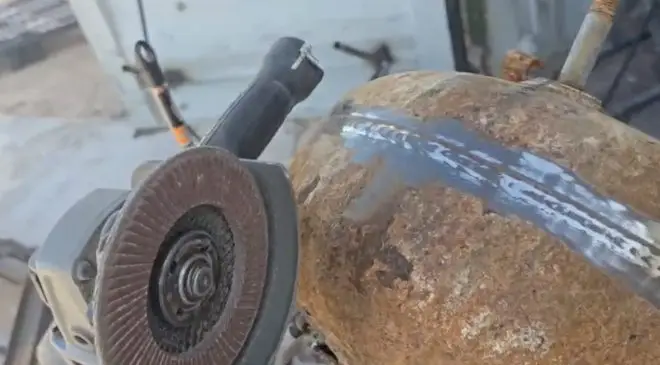
Root Cellar Strut Production: EMT Conduit & Stamp Press Demo
In this episode of Occupy the Land, we dive into

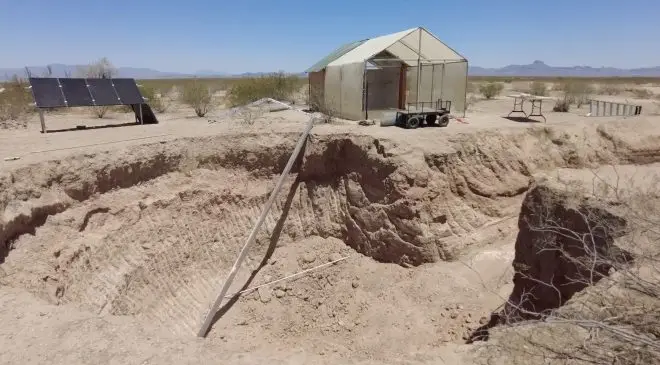
In this episode of Occupy the Land, we dive into prepping and pouring the concrete floor for our off-grid dome’s laundry-bathroom area! Using flexible PVC baseboards and a laser level, we ensure a level surface within the earthbag foundation. We mix a 5:1 concrete blend, screen gravel for the base, and tackle the challenges of a hot Arizona day. From setting expansion joints to compacting the base and planning for future walls, join us as we experiment and build our sustainable desert home, one pour at a time!
Here’s the transcript:
Okay. We’re prepping for a floor pour un our first dome that we’re going to be living in. And this is the first section that we’re going to do. The floor for the laundry room, bathroom area. Now, the way the formula works is for every inch a thickness, which is this is going to be about three and a half, four inches.
Double that in feet. So that means eight feet. So eight feet you know, is as now that’s a little bit more than eight feet like nine feet there. But is where you want to put an expansion joint. So we have two pores that we’re going to do for this. I’m going to go in three. But we really are putting a lot of, buffer around the edges and reinforcing it with the mesh and so on.
So I think we’ll be fine. Now, this is going to be the inside since we didn’t do the foundation of the slab. First we have to do it inside the earth bags. So we use this flexible PVC baseboard. That’s kind of where the level is. And we’re leveling it to the height of this threshold here. So we’ll use a two by four and screed screed thing that we have to go from there to there.
We use the laser level to make sure this is all the same height. So we’re going to go ahead and start the poor and put it there. Now we’re measuring now using five gallon buckets and a 47 pound bag of cement. Now then we will cap it down with that and then we’ll have the ball float. We’ll get to that later.
But the screening is just, using two by fours. Now, this is what our mix station is. We take one of these buckets of Portland cement, and the mix is probably going to be 5 to 1, 4 to 1 five. The one we’re going to experiment. We’re going to go 5 to 1 and see how we’ve done that we kind of eyeballed it before.
When we did the workshop floor and it worked out pretty well, and I think it was probably like five, 6 to 1. And it’s held up under all kinds of abuse. So we’re going to go, 5 to 1. And that is going to be with five of the, this height, you know, to that blue line. We’ll do five of the gravel and sand one Portland.
And then we’ll kind of, you know, we’ll do one water and see how that goes. And then we’ve got to be careful because it’s hot and it could cure really fast. So we’re going to be screening it and finishing it as we’re doing it now we have different grades of sand. Now this is for Adobe doing the earth bags now that we got, you know the base here that’s mostly cement just in bag cement.
So it’s going to hold up to, you know, erosion and water flooding of whatever the heck. It’s a good base, but you really don’t need all this gravel rock and Portland and so on. It’s made to do Adobe. Now, this over here is, got a lot of sand and gravel and clay. So that’s what’s going to be going up after we get this base of, we have like, four layers there and two over there with a hard base that was packed.
So we’re experimenting with the best way to do that. Now, here we have, you know, lots of sand and small gravel. Then we have the actual Adobe. This is, a little bit coarser. And then here is, you know, for sand and gravel for doing, the cement that we wanted to do for the floor. So we have different places around the property that we can get different grades and we can screen it if we need to.
But, I think we’re good with this. So we’ve already experimented when we did the, floor for the workshop, which is a, 29ft circle with a 30ft circle. And, we did it in sections. And so I think we know what we’re getting in for. So we’re going to go ahead and take this, do five of the same amount of buckets that we put in here, with the Portland.
And it goes in here and we just start, you know, mixing it and we’ll see what’s up. Because once we start we can’t stop. So we’ll go ahead and show you you’ve seen enough, time lapse of us doing some that and you kind of get the idea about what we’re going to go ahead and do is go ahead and get it in there, and we’ll take a little bit of filming of us screening it and leveling it and seeing how that’s work.
And and Donna’s going to be a big giant help. Right. Donna? Of course. So here we go. More fun here on occupied land. Oh, we just had our, bunch of railroad ties that were, given not given. I bought and they put, like 300 railroad ties on the other side of that, storage trailer that we have, and that’s for doing our fencing.
So we’ll get to that another time. Here we go. Welcome back to Occupy the Land. Occupy the landlord. Now, what we’re going to be doing is the additional for the second part of the two parts for the utility room, the laundry room, the bathroom that we built on the side of the dome that we’re doing for, so it kind of started off as just a utility dome, but we’re like, yeah, we’ll just go ahead and, you know, test out a lot of different things that we want to do on the main build that will start in October.
Now, what I’m going to do is I’m just going to show you some of the things that I got to go through to get ready for this. We’re going to do the pour probably in a couple of hours. You know, Donna’s off getting some more water and, we’re going to go ahead and, get to that this afternoon because our timeline for tomorrow with shows and I need to put our tractor on the trailer to transport it to my daughter’s new home, where they want to put gravel in the backyard, and dad has a tractor.
So, you know, we’re going to take care of that and help the family. But, so we need to get this done today. So that’s what we’re working on. And I’ll show you a little bit here. Hold on. Okay. The first thing that we need to do is get the laser level out, and we’re going to make sure we get the, border on the inside because we’re not doing the slab first.
This time we wanted to, make the bags, the, the footer, the foundation, and then pour the concrete inside it. Now, here you can see that we got this covered up. That is doing it kind of dirty. But this is the concrete that we’re going up to now here. You’ll see, you know, we got the, half inch foam, expansion material there.
And we’re going to go ahead and I need to first take a bunch of the material that we have for the concrete and shift it through that so that I get more of this course rock here that we’re going to be putting as a base here, like we did on this other side, and then this here we’re going to be putting up against the, you know, around the edge there for, expansion there.
And then we have this PVC base board that worked pretty well. You know, we did that just to make sure with the laser level, we get the right height all the way around so that we have a level floor. So that’s one of the things in this experiment is working out pretty good here. And we’re probably going to do the same thing on the inside of the actual dome.
Now, what we did on the workshop is we did a center that was a five foot radius or a ten foot circle on a 30ft dome, and then you had, eight pi structures. You know, we cut it into eight slices that we did it in sections. This is smaller. So we’re probably going to do about the same thing.
That worked out pretty well. We were almost at our limit on the workshop, but with it being hotter I’m glad it’s going to be a smaller area. We’ll see how much we can get away with because this bathroom, we really this is kind of maxed out. This is more than what we had poured before. And, it was starting to cure the we’ll get nervous there for a little while.
So the other thing that I need to do is right here, the entrance from this side into this bath area, we need to put, concrete threshold there that the door will set on, you know, like what we got here. So that’s what we’re going to be doing that. And then we also have it over here. So now we’re putting in I was going to put the cleats down.
Here is just a wood, with nails and stuff that you have plywood or particleboard that goes down. And then a two, two by four that lays up against that, that you screw into and it ties it in to the wall. But the concrete is it solidified and it’s hard. And I can just go up another level.
It doesn’t matter. So we keep that in mind. We’ll put those cleats in as we are building the wall. And it still hasn’t solidified, you know, it’s a lot easier to just put it there and hammer in. You’re done. But now you’ll drill in for no, that was a mistake. So we’re going to go ahead and do that.
Now the once we get the floor done then it’s just putting these circles around to we get up to the window level and then we got to decide, do we want the pony wall to go up to the bottom to the top of the window level. How high are we going to do it? Because when we put that dome on I want to have a really high ceiling.
It could be easily 20ft. So, you know, we’re going to get a loft out of it. And then we’ve been compacting this as we go along. So as we do more soil, which I’m going to need to do over there, and bringing that up on the other side of the outer ring over there, I take the bucket.
Even with the mixing bucket over there, that’s not ideal for it, but it’ll still scoop it up. And I just need to dump it on this. And then I get this coarse gravel that I’ll put on the base over here. Now we’ve already compacted it. It’s kind of loosened up a little bit, but we need to wet it anyway, and I’ll probably tamp it by hand as opposed to bringing out the, gasoline compactor.
This is heavy, but this is compacted, compacted, compacted a bunch of times. So we got a good base. So that’s what we’re going to be doing today. Donna’s got out the the concrete vibrator. You know, we, put a big pile, dump it there, put that thing of and it just levels it out. It’s amazing. It’s just fun to watch it do that.
Maybe we’ll get some video of that. Then we had the ball float and make it, you know, easier. Now because it was, the orientation wasn’t right. We had to use a two by four as opposed to this aluminum reading board thing that we used before. So on the edge of the height of what the concrete floor is over there.
And then, once we get these, baseboards leveled away, we want then we’ll be able to just screed. It just probably be a lot easier, but it’s going to be hot. But it’s not hot. Hot. It’s only 100 degree hot. It’s not a 110 or 50 degree hot. So that’s what we’re used to. So this is what we’re doing.
We’re just kind of clean up straighten up getting things ready. First thing I got to do is go get this, gravel and start separating out the, to get to the bigger rocks. You know, kind of like this. Put a, you know, nice base on that floor to put the concrete on. So that’s what I’m going to be doing now, Donna, I think she’s already did the, cut out of the, mesh.
I think you see the wire mesh over there against the, clothesline, and she’s already done that. So we’ll just lay that in once we’re done with that and we’ll start doing concrete. It’s a thing. Okay, now we have the first pour here and we want to do it level to that. And that’s what these PVC borders are.
But how do you put a screw in that. And then with it leveled up the concrete here and then be able to pull this out. So this is what we’re going to do. Go ahead and give it a bigger one there now because this is PVC. You know it allows me to do this.
And that keeps it from dropping. Goes in there and keeps you from dropping down when we put pressure on it.
Now we want to get it below because when we put the screening tool on just to level it off, you know, you still get it level. And I can remove that and then take these out. So that’s why we’re doing that okay.
Pouring the Dome Floor: Earthbags & PVC Prep in the Desert!https://t.co/BGHTxTYfL2
— occupytheland (@occupy_the_land) July 4, 2025
https://rumble.com/v6vqgh7-pouring-the-dome-floor-earthbags-and-pvc-prep-in-the-desert.html
https://www.brighteon.com/65430842-b907-4519-975d-94586ccd10aa
In this episode of Occupy the Land, we dive into
In this episode of Occupy the Land, we focus on
In this wide-ranging update from Occupy the Land, Ernie shares