3D Printing a House? Earthbag Walls Rise in the Desert!
In this episode of Occupy the Land, we dive into the exciting start of our earthbag wall construction! Using hyper Adobe mixed with Portland cement, we begin laying the foundation for our off-grid laundry-bathroom dome. From leveling the pad with sand and gravel to installing plumbing and doorframes, we’re tackling the challenges of desert building. Watch as we experiment with materials, compact the ground, and set the stage for 3D-printing our dome with earthbags. Join us for a glimpse into off-grid living and sustainable construction in the Arizona heat!
Transcript:
Welcome to occupy the land. Occupy the land, dawg. It’s time for us to start actually getting serious about putting up the Earth bag walls. The hyper Adobe is going to be mixed and that attachment, it’s a mixer that opens up in the bottom and dumps out into the earth bags.
We’re using the tractor a lot today.
Now, what we’ve been doing is a lot of stuff.
I mean, there’s so many things that need to be done, but, we got the doorframes up, we got the foundation for the primary dome,
Just so you know how hard this Adobe is. This is, so this structured Adobe paint, like five, 10% Portland on it. And this is the threshold for the door. There’s the door frame, and we’re putting in for the rough out, and then you just slide the whole door unit in. But we wanted to, reinforce this with some back, and then we’ll do a more open back around.
But these are just a, this grid that we’re going to put down. I want you to see how hard this is.
I mean, damn. So I think it’ll hold up.
but we been working a lot on leveling the pad here, and this is going to be a laundry bathroom, so it just kind of got tight. We could put everything in there. And so we we’re like, yeah, we wanted to experiment and a lot of different things.
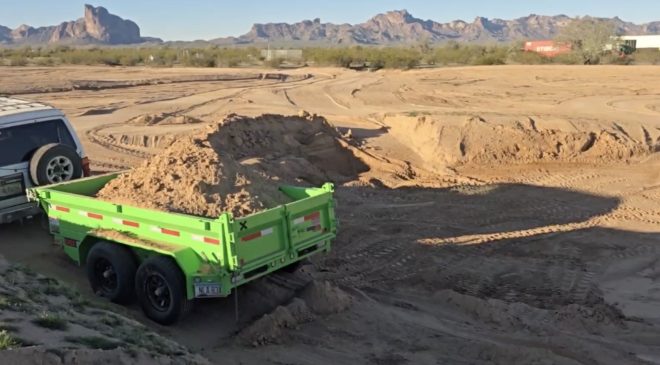
So we went ahead and kind of roughed out what we wanted and it just kept getting bigger. So what we’ve done is leveled this out with sand and gravel, gravel, gravel, rock and gravel, and we just keep building it up about a foot. And I don’t know if you can get the elevation here, but this is where the, the water comes in, from the shed off the mountains here.
And we have several washes that come across, and we need to control the water. Now, this is going to be definitely some flow here. So we had to build this up. Gosh, that’s at least 1820 four inches up. And you can’t really tell. But it’s elevated here. So we’ve been leveling this out and then compacting it with that compactor there.
And we had to put in the plumbing. Now it has for the sink. And we went two inch and you go inch and a half for sinks and so on. But I wanted to do two inch because at the end of it, we were having a washing machine that’s going in here. So we’re doing that. And, and we’re probably going to and future will be splitting off.
We have the option over there to split off between the septic and the wastewater so that we can, you know, separate that as it goes back into the septic back there.
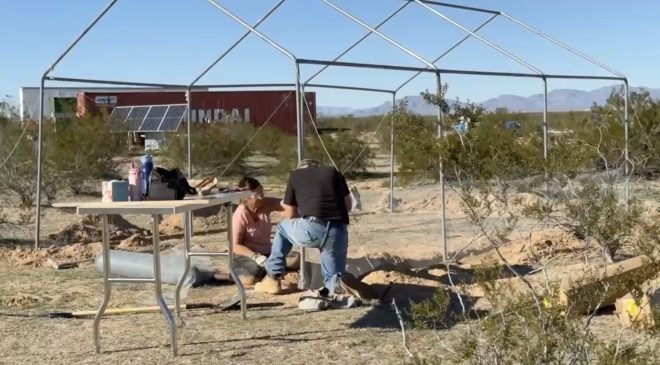
Ernie’s digging a trench from the utility dome to where the bus septic is, and we’re going to tie in something from the dome to the front.
But, so we’re working on that. We’re experimenting a lot of things. But this outer ring here that you see, this is about ten inches thick of, rock and gravel.
And then we put little finer stuff on it so we can level it out, because we need to have the earth bags go right in to the earth bags of the dome here. We’ll have one layer there and then the overlap the next layer will overlap that. And then we’ll just keep building it up. And this is the point that we’ve been trying to get to where we can just start doing a bunch of earth bags layer, layer, layer, layer, layer.
Now, if you’ve seen our check dams that we’ve done using this material, you can see how it’s done. It’s like 3D printing a house and we’re going to be showing that next week’s video. You’ll see a hyperlapse of, just, you know, here we go. You know, everything has been to get ready to do this. Now, the first layers are going to be we have a lot of different, material that we can get.
Now you have here’s a good example. This is the like you’re if you’re making Adobe or cob or something. And it comes from our area back where we’re doing the sand dam way back over there. You can see the earthworks over there. Now, what this is for is for mixing like Adobe, you can do brick and you can put it in the earth bags primarily.
But in the first layers, because you don’t want to have to worry about moisture and water penetration and all that. And you call it structured Adobe. When you add Portland cement, it makes it a lot more durable and it doesn’t decompose or, you know, melt or, or turn into mud. And we’ve done this before with I’ve got a couple of years ago when we were doing live experimenting and you take the just a dirt, just regular dirt here and you go ahead and mix in the concrete and you take the bricks that we made, and you put it in a water trough.
And for a year and a half it doesn’t dissolve. So I’m not worried about that. But if we take this from certain parts around the land here, it’s just like this is how it comes. I mean, it’s just and the thing is, is that, you know, there’s almost no.
Dirt. I mean, it’s just rock and sand. So we add a little bit of Portland that and it’s concrete. So when we do the concrete, the first couple of layers at the foundation footers for the bathroom and we’re going to be fine. But the, to do that, the first couple layers get up about a foot and then we’ll, start just using the regular Adobe, maybe a little structured Adobe, and certainly around the doors.
When you do the door jambs, you want to have the cement in those bags. And there’s the, the bags and it’s just like a tube stuff. We put it on a, now you can see it over there. It’s A55 gallon bucket. And we just squish it up on on to it. And then you fill the bucket and it just feeds out like a 3D printer.
And that’s what’s going to be going on here. We’re going to start this today.
Now when you put it up against the the door jambs here, you put a little bit more Portland in it and cement. So that’s a really hard, wall that goes around it. There’s different places that you put different, consistencies on it.
Just and we’re experiment and we’ve tried and done various things. We know where we think we want to do. Now, how are we leveled? This is there. We have the, you know, the laser level that we get out and we put the laser on and we get reference points that we use these stakes for. And then we just take like this excreting 16 footer.
It’s long for when we’re doing the big domes and so on. We did the foundation for the workshop, but the, two by fours work well, and you put it a long level on it. You just start at one end and you just keep it level. We go out and then we checked it with the laser and it’s within, like got eighth of an inch, you know.
So and it’s so deceptive here. You know the undulation of the ground and building it it up it it’s hard. You can’t eyeball it. You just can’t.
This is a demonstration of how the mixing bucket works. We scoop up the material. In this case it’s the gravel, and then we’ll put the Portland cement in there and the water, and it gets all mixed up here in the bucket. And on the very bottom of the bucket is the under pressure. You can see upper and dirty slides that open and that’ll be dumped into the earth bags.
00:09:12:19 – 00:09:22:18 Unknown And we do that a bunch of times. Do we do one round or one coarse. And we just keep doing it until we have what we need.
So you fill in and we have an opening in the bottom of the mixing bucket.
And it just drops right in there and it just feeds out. And you just, you know, 3D printing, a wall and it’s it’s awesome. And this stuff works great. Now we have ten of these rolls and are 500m each. So five kilometers of this. Guess what? We’re going to have a lot of check dams and do a lot of building with it.
Well, we tried hyperlapse in it, putting it on a tripod, but the phone got too hot and it just stopped and didn’t record any of it. Well, we’ll do another round, you know, tomorrow, the next day and, and, show you how it’s done. But this is what the result is. So this is the you know, this is concrete.
You know, basically and pounded level with the laser and levels and left, right and lengthwise and all that. So this is the outline of the bathroom that will go on the side of the structure. So we just wanted to let you know now over there where the red meets the white main there. There’s going to be another door that will go into the bathroom, you know, from the patio area out there and so on.
So we’ll have access to it. So be cool. But this was not that hard. It’s 1:00. We probably got really going, you know, about ten. So this is a few hours work and 100 billion degrees. But you know, we got our neck soccer things and, head scarfs and so on that we have that we soak in water and it makes a big giant difference.
Giant hole. It’s a Arizona thing. And because it’s dry here, it keeps you cool like my neck is, you know got it cold. So it really works well. And, so we’re just making sure everything’s level and then we’ll do the next level, and then it will go over the white, and then it’ll start binding it in. And then we’ll alternate, you know each level.
So that’s what’s going on so far we got today.
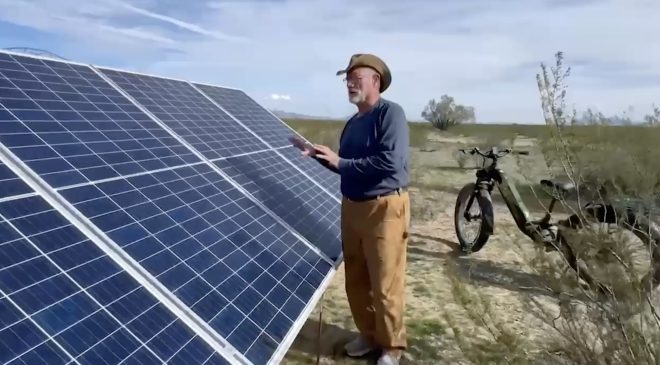
the dome structure is really good for making a roof and to make it all monolithic. And as you coat it with cement and whatever materials er create, still create a lot of things that we’re gonna be experimenting with. And you have a really good strong, structured roof ceiling and, how we’re finishing that, we’ve done that before, too.
And, we’ll be bringing you along on that. But I wanted to make sure you guys saw at what stage we’re at, and there’s so many things involved and just going and getting the materials and, you know, buying all the stuff and, you know, planning it out. And we didn’t, you know, and it’s hot. You know we get out early in the morning and start going and we’ll go to midday and then maybe in the evening we do some stuff and then we got all our work on our sites and so on in the show.
And yeah, I mean, it’s a thing.
Well, this is where we get our water. It’s an agricultural field. And there’s a guy that we work with that we can get as much as we want for $500 a year. So we just have this big high pressure hose, the upper IBC, which takes about one minute. It’s clean water, well water. And, that’s about it.
You can come in pretty much any day of the week except Sunday. And it keeps us supplied and water.
So we’re about here making it work and living the life. But it’s just beautiful out here. I it’s so decompressing and we feel healthier. And Donna’s getting tanned I mean, you know, my kids are like, man, put a hat on that girl. So I had to insist she was that. But she always has.
And we had our pool, where we lived in North Phoenix. And, she was outside all the time, so she just casually. Well, you know, you know, we have four of our children to, tan really good. And the other ones are wider. But you know, this genetic thing. Well, she she likes being out here, and it’s just nice.
Well, we’re going to go ahead and get started. We might have a little bit of video. They’ll make it this week for you guys to see what and how we’re doing. But next week is really going to show you what’s up. So say goodbye, Donna. Bye. Peace